Fixing an Old Farmhouse – The Porch and Side Entrance

Following my last garden blog post, and since our future garden projects will require more time, energy, and budgeting, I will share what we have done so far on the outside part of the farmhouse, and will share the indoor work in future posts as well.

This was a 1910 abandoned farmhouse, and all I know about it is what the neighbors and people who have lived here at some point, or have played around when they were kids have told us. No one seems to have old pictures of it, and for what I understood, the house was part of a large farm that was eventually subdivided and sold in plots of land. It seems that it had two owners, the original owners, farmers, and the last owner who bought the remainder of the farm. After the second owner died, it became a rental, and later on sat abandoned for some time. I found interesting that many of the people who came to see it asked, “Where’s the barn?” or “What happened to the barn?” I never saw a barn in the property, but they insist that there was a large old barn to the left of the house, and behind. The barn remains a mystery. The feeling I got throughout many conversations with people who knew the place well is that all of them seem to have loved the house, and it was a main stop, a landmark for them. Last year, one person referred to it as “that was my house,” lamenting that he thought of buying it at one point, but did not. Another woman stopped unannounced one Saturday morning, and told me that she needed to stop by to see “the house” before returning to Maryland. She had been around for a week, and was ready to return home that same day. She told me that she wanted to buy it but everyone had told her that it was in severe disrepair and would be too expensive to fix. She regretted her decision, as she told me. I told her it was true. The house was in very poor shape, inside and out, a true nightmare from years of neglect by uncaring renters and many years of abandonment. For us the expense would be much less, because we did much of the work ourselves, and only contracted out what we could not do or what needed expert attention. One of those items was the window repair, and so far the most expensive item. The windows were broken and boarded up. We could not replace the windows ourselves because each window had to be custom made. Each window has different dimensions and standard windows could not be used. The upstairs windows are large and they go from floor to ceiling. The ceilings are low. It is one of the features I like most. Ideally, I would have loved to replace the broken windows with wooden ones, but due to budget concerns we had to go with custom made energy efficient vinyl windows, although we selected good quality.

It became obvious that this house had been loved by many, and still is, and that the previous owner was a very kind and welcoming woman who loved her garden. I think that is wonderful. To this day, one big ticket item remains on the list, and that is a new metal roof. The old one was in less bad shape that it looked, so we were able to coat it, and replace missing screws. It has been working fine, although it is not visually attractive, and since it is the original tin roof and over 110 years old, it must be replaced. When it is replaced, it will be done with a metal roof, which weighs three or four times less than a shingle roof/asphalt roof or other type of roof. Being it an old building with an original stone foundation, we don’t want to add the extra weight to it.

As far as siding, we decided to keep the original aluminum/metal siding because it was in good shape. I have had experience with installing new vinyl siding on my previous home, and it did not hold its appearance/shape too well. Therefore, vinyl is not my favorite choice, and other materials are costly. The actual aluminum siding will have to be repainted throughout the years, but that is fine. Underneath, there is wood, and on top, the aluminum siding. Its white color had faded, and it was very dirty, with many areas covered in vines. We cleaned it up, removed the vines and shrubs, and gave it a coat of fresh white paint; it showed like new. We concluded that there was no need to replace it. Here is the old farmhouse with the rusted roof and old/broken windows and doors.

Here is the house after a good cleaning, repainted siding and coated roof, as well as new windows, and other outside repairs.


The side door was one area that required much attention. The lack of an overhang structure resulted in water/moisture damage. The door was rotted, as well as the wood surrounding it, and the floor boards. We had to remove and replace all of it. In addition, the concrete steps needed to be fixed and painted.  We poured new concrete and painted it. Here are a few before and after pictures.

Before, during the process.


After. All the rotted wood was replaced. We built an overhang to protect the door from the rain and also installed a screen/glass door for extra protection.

IMG_5050

Photo by M.A.D.


Another area that was in very bad shape was the porch. The concrete floor was broken, and so were the door, windows, porch columns, and ceiling. We poured new concrete and painted it, cleaned the siding of vines and glass debris, installed new windows (contracted), and installed a new door and screen door. We replaced the wood on the porch columns, and some rotted wood on the ceiling as well. The broken wooden wheelchair railing/ramp was removed, and the steps were fixed and painted. Everything was given a fresh coat of paint. Eventually, the concrete floor will be covered with brick or slate tile for extra protection and durability.

Before and during the process pictures.


After, the porch as it is today.


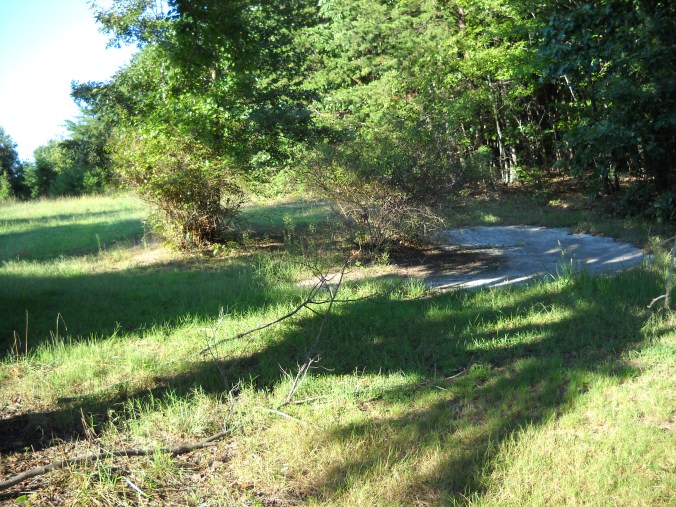
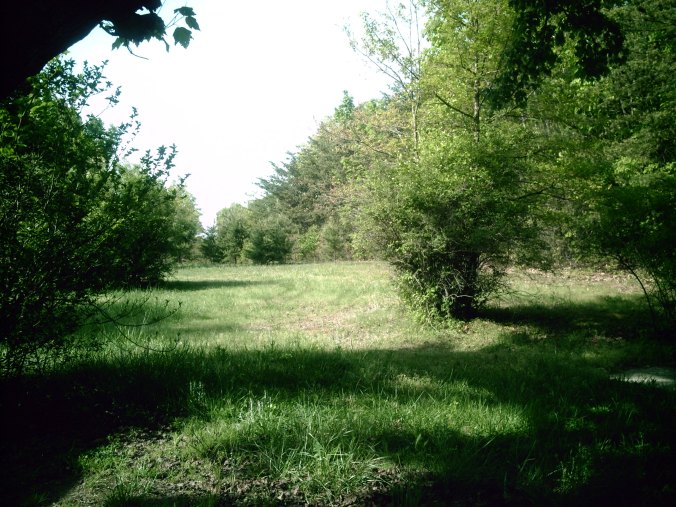
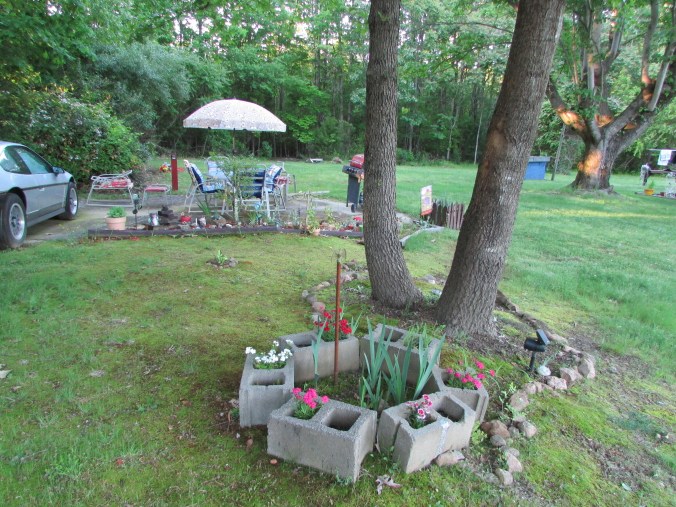
This concludes the outdoor of the farmhouse so far. There are a few outdoor projects that will be done in the future, and those include garden projects, new roof, and the removal of large trees. The large trees job will have to be contracted. All the outdoor work has been done my husband and me, except for the windows, which required special attention. It has required a lot of devotion, hard work, dedication, and patience, but it has also been fun and rewarding. I hope you enjoy this post, and that it will inspire you to see the potential beyond what is deemed useless or beyond repair. I hope that it inspires you to take on some do it yourself projects, as well.

Recycled Garden Projects

On this post, I will share two very easy garden or backyard projects. These were made using recycled materials. We love hummingbirds and we decided to have a better place for them to come into the garden. My husband built this hummingbird post, and I painted/decorated it. We placed it in the faerie garden where it is mostly shaded during the day. Sometimes, the sun can make the sugared water too warm. We used leftover wood, the leftover paint we had from the previous light posts project, and other materials we had available. I thought it would take some time for the hummingbirds to find the spot, but they did right away.

IMG_5081

Photo by M.A.D.

The next project is something that sprung out of necessity when we first moved to the house, and we have been adding to it as the need arises. We needed an area where we could work while standing, and also where I could clean the rugs and let them dry. Eventually, it became an all purpose area. It has a worksurface/table, a rod to hang items, a hook to hang the hose, and this year we added motion solar lights, which help illuminate the area located at the back of the house. We used recycled wood from pallets and leftover wood. Recently, we gave it a fresh coat of paint. We are surprised at how much we use this area. It will probably evolve as the need arises.

IMG_5080

Photo by M.A.D.

I hope you enjoyed this post, and that it inspires you to create something around your place.


The Long Lost Garden

I love flowers and all kinds of plants. Maybe because I have strong memories of my grandmother’s garden when I was a kid. The garden was not large, but it seemed huge to a 4 year old. I felt at ease in it, lost in time in it. Eventually, the garden was eliminated and concrete took its place. The magic was gone.

My favorite style of garden is the English garden. It is wild and free, and at the same time contained by itself. I always thought that an English garden had soul. I dislike manicured gardens that are too planned, symmetrical, and rigid. Where’s the life in that? When we purchased this old house, it had been abandoned for 3-4 years, neglected by previous renters, and the owners where out of state, the heirs to a woman who loved her garden. People who grew up in the neighborhood and knew her, tell me about her love for flowers and plants, and how she used to walk through her garden, admiring it. I am told she was a very tall woman, and neighbors were used to seeing her walk regal amongst her plants. Unfortunately, she fell on an icy day, and never quite recovered. Her beloved home became a rental, and no one took care of her garden the way she did. Eventually, the house fell in disrepair and ended up a dilapidated farmhouse waiting to be demolished, either by time or by people. That is, until we found it and resurrected its soul. This post is about its garden, and about uncovering and working with existing areas in an effort to use the not so obvious/the hard to see potential, and saving money in the process.

The house and premises were covered in overgrown vegetation, and the preexisting garden, if any at that point, was gone. There were a few plantings in bad shape. Unable to move right away, we took short trips to start clearing up the overgrown vegetation, and once under control, hired someone to cut the grass regularly so it wouldn’t grow too wild again. The house sat for another five years until we moved, for a total of eight years. As we cleared the morass of bushes and trees, we got an idea of what could be salvaged and what had to be removed. It was a long process that continues until today, mostly because we are doing it ourselves. Three very large trees remain, two dead trees and one very large near the house. It is diseased and requires professional handling as well as the other two. That will be next on the agenda.

Few plants remained of the original garden. An overgrown hydrangea in bad shape, a tiny rose bush buried in weeds, two dwarf boxwoods that we thought were gone for good but made it. A Rose of Sharon bush that we were able to save, a large bush of ornamental grass, and existing pine trees. We were able to free a forsythia that was growing wild under the siding and spread out high over the porch. Remnants of irises and other small plants were found thriving under bushes and all kinds of weeds. We transplanted those to other areas, hoping for the best. They took to their new area beautifully, almost as if grateful for being freed. Little by little we found bits and pieces of what once was a woman’s beloved garden.

When I think about it, it was a lot of work, hard work. Our neighbors cannot believe the transformation. One neighbor told us that he thought the house was eventually going to be torn down or fall on its foundation. Many people have come to see the house, a house they lived in at one point, played in, or visited. They all approve of the respectful changes, and they all agree that the woman who loved her garden so much would approve of it as well. I am glad they feel that way. It means that we are accomplishing what we set out to do. On this post, I will share some before and after pictures.

Entrance to the house then, and entrance today.


One of our latest projects was to add marble chips around the house to prevent weeds from growing. This area was covered in weeds and bushes. All the plantings were existing or transplanted from another area when found. The rose bush has grown healthy and has required a trellis.

IMG_5050

Photo by M.A.D.

IMG_5049

Photo by M.A.D.

Here you can see the forsythia that we cut to shape and trimmed. It seems happy now. All the potted plants have been added or transplanted.

These are the same areas before. On first arrival and after clearing some of the vegetation.


The foundation to the house is an original rock foundation, which has been supported with cinder blocks over time. We cleared out the weeds, painted, fixed the crawl space doors, and placed marble chips and potted plants around it. We also added solar lights, and rocks that we collected around the property.

This is a before picture, when we cleared out some of the weeds and grass.

Digital Camera

Photo by M.A.D.


This is the same area now. Here you can see the trimmed Hydrangea bush and existing irises. The pine tree in this picture was found as a tiny (2 inches) planting that I thought looked interesting enough, and I potted it. It turned out to be this beautiful pine (cedar) tree. Eventually, we will cover the exposed cinder blocks with cement and repaint the area. On this picture you can see the original stone foundation. One thing we made sure to do before buying the place was to hire an inspector to make sure the foundation and structure were in good shape. Those were fine.

IMG_4996

Photo by M.A.D.

The marble chips were placed all around the house. Here you can see two existing bushes that we were able to save, after trimming them, and also one of the dwarf boxwood trees behind the bird bath. This boxwood was almost dead and it has come back slowly. The lily is also an existing plant. We added all the large stones found around the property. The Hostas and Hen and chicks plants are new, and added to the area. These were brought from my garden in Jersey. All the statues are recycled from my previous home in Jersey, and so is the bird bath.

IMG_5046

Photo by M.A.D.

IMG_5047

Photo by M.A.D.


Here you can see the other dwarf boxwood and other recycled plants.

IMG_5045

Photo by M.A.D.


Here are some pictures of the same areas before. The dwarf boxwood looks brown and dying.

l03d70842-m0xd-w480_h360_q80

Photo by M.A.D.


A before view of the same steps where you can see the boxwood better.

Restoring an Old Farmhouse on a Budget 2

Photo by M.A.D.


This is the side entrance area. There were no plantings, only weeds. This area was challenging to work with.

Digital Camera

Photo by M.A.D.


Same area as it is today. New plantings have been added to the area, as well as recycled. All pots in the garden are recycled.

IMG_5052

Photo by M.A.D.


We worked with some existing areas by keeping some of the plantings, and adding stones and new or transplanted plants. Here is one of those areas before.

Digital Camera

Photo by M.A.D.


Same area as it is today. The only existing planting was the bush in the center, The rest was transplanted from other areas of the property. This area blooms throughout the year. In early spring the irises bloom first, followed by the lambs ear, and later in the summer other plantings bloom. A solar light and a couple of statues and rocks dogged around the property were added.

IMG_4835

Photo by M.A.D.


This area is directly under the giant cedar tree. It is one of the oldest trees around the house, and possibly older than the house, as I am told. We cleared/cleaned the area and added existing plantings around the tree. Red mulch was added as well.

20200329_160734

Photo by M.A.D.


The giant cedar before. Today, it looks healthier.

Digital Camera

Photo by M.A.D.


Other existing areas that we were able to save. Before, after clearing the area a bit and cutting the grass.

Same area as it is today.


I have mentioned the faerie garden on a separate blog post, and it is one area in which we added much to it while working with existing elements. The area before and after.


There are a few new areas, and that includes the veggie garden which was not there, and what I call the circle of flowers. Pictures of this area before. Today, the circle of flowers is where the overgrown bushes are, and the veggie garden a few feet right behind.

Digital Camera

Photo by M.A.D.


The veggie garden


I created the circle of flowers because I wanted an area full of color, where I could pick some flowers to bring inside. It started with clearing out a circle where old stumps remained, and placing some stones we collected around the property. We planted some seeds, and many of them continue to grow and bloom today. Next to it, we created another circle (still needs the stones around) where we planted sunflowers. They have not bloom yet, but soon they will. As of today, they are a lot taller.


This concludes the outdoor changes so far,  although there are many other plans. We created areas around the home, and separate, individual new areas. Instead of tearing everything down, we worked with existing areas that had potential, by first uncovering them, salvaging some plants, and adding to these areas.

Little me in my grandmother’s garden. Hope you enjoyed this post.

me2

Photo by M.A.D.

The Recycled Veggie Garden

As soon as I spotted this old farmhouse, I had a vision for it. It took my other half a bit more time to see it, but from the beginning he saw the potential it had. Immediately, (as it usually is for me) tons of future images began circling my head, and those would evolve into plans. One of those plans was to have a vegetable garden. For that to happen, we had to clear out a lot of years of grown vegetation, trees, bushes, and later on decide what type of garden we wanted. That took some time and a ton of hard work, but between my husband and I, we managed to get to a point were we could plant and grow something. This garden has not disappoint me. We decided not to plant on the ground because it was easier to control growing in raise beds, and I had an issue with the many (I mean many) critters that walk/crawl around. Also we have many deer coming through so we decided to create a fenced garden. The goal was to spend as little as we could, and most materials used (except for mulch, a few solar lights, soil, and paint), are recycled/repurposed/reused. That being pots, wood, garden accessories, and décor. As of this writing, I have already harvested lettuce twice, and a few peas, the rest is still growing, but soon it will produce. This year we planted two varieties of tomatoes, peppers, three varieties of lettuce, cucumbers, carrots, potatoes, and peas. This will provide plenty for us, and to give away as well. We set up a spot in the back of the house to plant squash and pumpkins, but I am not sure how that will grow. It is not fenced and deer prance around. Eventually we will add another raise bed to this garden, as there is enough space for another one and more pots, and I think for a small portable green house as well, one that could fit into a corner. We placed a recycled shelf to use as a potting station and storage underneath. It works fine. The construction was made using recycled wood and pallets. Here are a few before and after pictures.

This is the area as it was, abandoned for many years, overgrown with all kinds of trees and bushes intertwined.

Digital Camera

Photo by M.A.D.

This is during clean up. The larger trees and bushes remained at that point. Before removing a tree or bush, we thought hard about it. If it was salvageable we left it, but most of them were inside a morass of weeds and three or four varieties growing together at once. So it was difficult to separate them. We were able to save a few.

Digital Camera

Photo by M.A.D.

This is today. View of the area where the vegetable garden is.

IMG_4641

Photo by M.A.D.

IMG_4944

Photo by M.A.D.

IMG_4945

Photo by M.A.D.

Deer wishing for a veggie bite. She is next to a tree that we were able to save.

IMG_4909

Photo by M.A.D.

At night, I enjoy seeing the garden come alive as well. I placed solar lights in a few areas.

IMG_4951 (2)

Photo by M.A.D.

I painted this in 2012. It is the farmhouse as I saw it, abandoned, but I saw beauty in it.

IMG_4824

Photo by M.A.D.

This garden will continue to evolve with us, according to what is needed. It is in the beginning stages, but it has room to place more containers where we will grow other varieties of vegetables. There is enough space to add to it if we need to. I hope I have inspired you to create a simple garden if you have been thinking of building one. It does take work, but not a lot of money if you recycle materials. You don’t need a lot of space, and if you live in an urban area, a small area in your porch/apartment can accommodate pots or hanging baskets. You can plant something anywhere. It has been a fun and interesting project so far. For me, it is a place to grow food but also a place where I can find relaxation, a peaceful retreat, hence all the bunnies … I hope you enjoyed this post.


No More Skeletons in the Faerie Garden

Continuing with the old farmhouse posts, I will do another before and after of the garden area. It had been a lot of hard work to start getting this old place into shape, and this year, it is starting to look a bit better. It has been almost five years since we moved here. For those of you who are wondering what happened to the older posts, I had an out of body experience and one day woke up wanting to make this blog only about writing. Without a second thought, I deleted all those posts and the memories with them. Later, the alien inside my brain crawled out and I realized that this approach was not working for me, and I missed the old ways. I am more a glimpse on all sides person, so I decided to bring back those glimpses on this blog. I don’t think I can get back the deleted posts, so I am moving forward with some before and after posts. Hope you enjoy these.

The faerie garden was an area that was covered in bushes and weeds. It had a large carcass of a dog or coyote (I could not tell the difference) resting on a small piece of concrete. After clearing out the brush in the area, we discovered that the small concrete area was under grass that had taken over and continue to grow atop, alongside some moss. We scraped the area and uncovered a generous size concrete circle where we decided to place some patio furniture, a grill, and create a small faerie garden, which has always been a little dream of mine. The area has a large amount of kelly green moss growing and expanding, and I have always been a fan of moss, so it happily worked out. Every year, I add something to the area, whether plantings or any decorative feature. We tried to work with was already there, and it works for us. Here are some pictures of the faerie garden area before.

023

Photo by M.A.D.

This is the area as it looked before, although we had cleared out a bit at that point, the skeleton gone. There was an electricity pole that one day just disappeared. It was puzzling; how does a gigantic pole disappears? When we inquired, it happened that when the previous owner closed her account after selling the property, the electric company came and took the pole out of the ground. I found it hilarious. Here are two different views, one of them uncovering the concrete circle.

Digital Camera

Photo by M.A.D.

Digital Camera

Photo by M.A.D.

Here are a few pictures of the area as it is today. I am sure that we will add to it over the years, more on the form of plantings, garden lights and stones. The flowers in that area will bloom around late spring/June. It is mostly a shaded area so I am happy that something blooms.

IMG_4701

Photo by M.A.D.

IMG_4636

Photo by M.A.D.

A closer look of the critters and mossy area.

IMG_4660

Photo by M.A.D.

Viewed from another angle. Al the stones, wood, and cinder blocks were found on the property, either around or in the woods behind. We dogged out many stones. The goal was to utilize what was already there, and find a way to create areas with purpose. When we start a project, we set a very low budget, and we consider existing/found/recycled/reused/restored/vintage first before spending on new. This approach has worked out for us.

20190714_184243

Photo by M.A.D.

67349-1

We added solar lighting to the area by  utilizing recycled wood, and painting it. All the outdoor lighting is solar. The area continues to emerge over the years.

I hope you enjoyed this post of the faerie garden. I will post more before and after pictures of other outdoor areas/projects in the future, as well of the farmhouse work.