The Simple Life – Got Your Back!

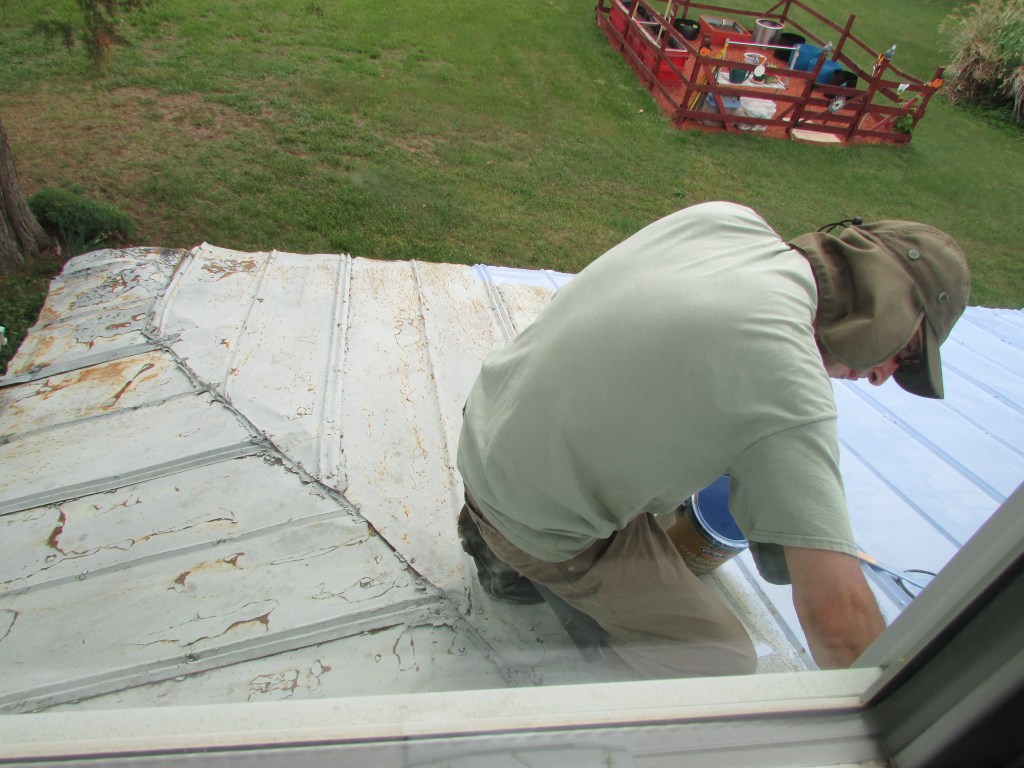
I wish I could say that living a simpler life is simply easy, but I’ve found that there was (and is) a lot of work involved, dedication as well. For us, it meant to tackle a huge list of things to do as well as learning the other things we needed to learn to do those things efficiently and economically in a limited amount of time. To read more on that you can visit Fixing an Old Farmhouse series of posts. It also meant leaving some things behind, some we didn’t want to leave, and some we did. We also had to deal with the pressures that come with all of that, but most important, we had to work as a team, be on the same page, and define what good work and accomplishment meant for us. We had to realize that each day brought new challenges, and every day was different. The cookie-cut routine was over, and there was no room for costly mistakes. We had to reach a new level of trust as a couple, and trust that “I got your back” was enough. Enough to get the job done and keep on going with the blessing of the Lord.

Hard days behind gave way to plans and possibilities, and a sense of balance, and with it, a feeling of good work and accomplishment, the sweet satisfaction of the challenge. There will always be good days and less than perfect days, and a list of to-dos; however, as long as “got your back” remains our motto, simple living becomes sweet living. Living the simple life entails realizing that each day brings challenges and blessings of its own along with sweet satisfaction.

New challenges are about to test people in this country and worldwide. Our faith, values, and belief systems will be tested in ways we are not accustomed to. As a people, as a nation, we might have to learn to “get each other’s backs” and come together as one.

Love and light.

Photo by M.A.D.

Farmhouse Project – Porch Roof

When we bought the old farmhouse, we decided to coat the roof because it was the original tin roof, and it was not leaking or damaged underneath, but needed protection since it was 100 years old at that time, and by now, 112 years old. Tin was the metal used back then, sturdy and durable, less pliable as well. Modern metal roofs are easier to bend and work with, and they come in a variety of styles, colors, and grades. They are more expensive than regular asphalt shingles, and they last a bit longer. We decided that when it was time to replace the roof, we would select a metal roof because the house was originally built for a metal roof. Shingles weigh about four times more, and being that the house is 112 years old, it makes sense not to add more weight to the top. However, that would mean for us to save the money for a new roof because it is a cash project, as it has been the rest of the house renovation, hence why it has taken longer to do. In the meantime, we decided to paint the porch roof because it was showing signs of deterioration and rust. It has been 6 years since the coating.

This project presented an opportunity to play with a favorite color and see if that color would work when it is time to purchase a new roof. I discarded the color black although it is the one that will make more sense if we decide to change the siding color in the future. Black looks more traditional, elegant, and put together, but it also attracts a lot of heat, and the upstairs ceilings are very low, so that would make the upstairs unbearably hot in the summer and not energy efficient. I also like copper or light brown, much lighter than black, and also neutrals, which would go very well with my favorite blue accents and the white siding. In the end, we decided to paint the porch roof the color that we liked more but were not sure how it would look in the long run or if we would become tired of looking at it. It is a test. After all, you cannot change a pricey roof once it is installed. We chose Glidden Premium French Country Blue for exterior applications and metal. We are happy with the results, and the porch looks a lot cleaner now, until it is time for a new roof. We decided to paint the side entrance awning and the steps as well, for continuity and balance. Here are some pictures of the project.

The new paint will also protect the coating that was applied six years ago. Notice the old way of installing tin.
Closer look of the color – Glidden Premium French Country Blue
We painted the side entrance steps and awning. Originally, the house did not have an awning, and the door entrance was completely rotted. My husband built the awning and now water does not cause any damage. Here’s a picture of the rotten door.
This was the side entrance before. Damage was extensive.
The old porch ceiling will be painted the same color. The bag filled with water and a few shiny pennies is something that is done in the South to get rid of flies and other flying insects. Restaurants do it to detract flies from coming inside. Someone told me about it, and I did not believe it at first but decided to give it a try. For some reason that I cannot explain, it works. I placed another bag at the opposite side, and one by the kitchen entrance. Flies and other critters are gone, but wasps do not seem to care.
Side view of the job done. This is a test, and later on we will decide if we will paint the rest of the roof, depending on how that particular paint performs.

We estimate the total cost of this project, including the entire roof of the house to be around $400.00. It presents a simple solution to protect the existing roof until it is replaced. After all, it is about simple living and simple solutions. It’s been a long way home.

Love and light.

Simple Beauty

The simple and pure beauty of flowers. A few pictures of what’s in bloom right now.

Photo by M.A.D.
Photo by M.A.D.
Photo by M.A.D.
Photo by M.A.D.
Photo by M.A.D.
Photo by M.A.D. I have no clue what this plant is, but I like it. If anyone knows please let me know in the comments. It started as one and it keeps fanning out.
Photo by M.A.D.
Even the recently trimmed old tree is starting to show signs of life. It was trimmed about a month ago. (Photo by M.A.D.)
The grape vine is growing beautifully. The idea is for it to wrap around the veggie garden. (Photo by M.A.D.)
My favorite shade of blue (Photo by M.A.D.)

Love and Light.

Restoring an Old Farmhouse Garden – New Areas

The work continues in trying to bring back the garden. When we bought the old farmhouse, it was covered in weeds, grass, and a morass of trees growing intertwined altogether. The driveway was covered in tall grass up to our knees and bushes. The house had been abandoned for many years and in disrepair, hidden by the same overgrown trees and bushes. We knew it would be a ton of work, but we were up for it. One by one, we started to remove bushes, weeds, grass, garbage … and we cleaned up the garden. Next, we tried to save any plant we could and revive others. The next step was to create new garden areas. This is a process that will take longer, and some simple planning. We try to add a new area every year. Adding areas one at a time seems a bit more manageable for us. This year, we added two areas. One was created using recycled plants and materials. It is located at the front entrance to the property, close to the year-round lighted pine tree which we have ended up calling The Hope Tree.

I started this area a few weeks ago and completed it yesterday. I had to wait until some of the plants were ready to be divided in order to be planted. So far, they took well in the ground, and hopefully, will grow and become fuller. This area is a mix of shade and sun and should be easy to manage. Red mulch is my favorite.

The next area was my husband’s pet project. It is next to the small patio area and the faerie garden. This area has been covered by overgrown mixed bushes and tons of weeds. Last December, he took them all out and decided to do a small garden. Most of the area is in the shade with only a few hours of sun, so we had to select plants that required minimal sun exposure. He made the borders out of recycled pallets, and we still have to find and dig a few stones around the property to place them. This area needed a ground cover, after we took out all the weeds. These plants will grow and expand, so we had to leave enough space in between them. We planted bulbs inside the stone circle. Two garden sculptures and a potted plant were recycled from the garden and won’t be missed in the previous area. We added two new solar lights and red mulch. The small cedar tree in the back was already there and will be trimmed so it does not fully grow. This area resulted in a mix of new and recycled materials. It is a very low-cost improvement to this area.

The veggie garden was spruced up a bit, and we decided to use two recycled large containers cut in half for the new plantings instead of building a new box. Eventually, we will change these to a more permanent material like cinderblocks or metal boxes. We started the veggie garden a couple of years after we fixed the interior of the farmhouse. All the materials used on building and setting up the veggie garden are recycled, except for mulch, but sometimes, we use red pine needles from the property when these are available.

The veggie garden has been evolving over time.
And after all that work, it is always good to eat something hearty.

If you would like to read more on the process of fixing this old place, please visit a series of posts under Restoring an Old Farmhouse or Restoring an Old Garden. I hope you enjoyed this post.

Love and light.

Garden Bliss

I love this time of the year. The beginning of Spring, when bugs are still half asleep, and the garden is awakening. The temperatures are a bit cool enough to enjoy preparing the garden for the rest of the year. That is what we have been working on, setting up the garden. Cleaning up winter’s memories and hoping for a good gardening year. Last year we had a drought, and everything looked sad and dry. I am hoping for plenty of rain.

We cleaned up around the garden and added a new flag. Heavy winds and ice destroyed the other one. The first blooms are here.

We cleaned up the veggie garden. Had to discard one of the large boxes; it broke on the sides. A layer of fresh mulch was applied, and containers were moved around to make room for new planting boxes. My husband made veggie markers, and I am hoping to plant much more. Despite the ice and crazy weather, lettuce came back from last year. Two full containers, so I will not have to plant lettuce this year. It survived the frost.

I started two new areas in the garden this year. These are a work in progress right now. One is at the very front of the property, and the other area is next to the faerie garden. This area is covered by lush green moss in the spring, which I love, and the only thing I have been able to plant here are hostas; it is a shady area. We try to add to the garden something new every year. Little by little this garden has been transformed from the original mess of weeds and overgrown bushes to something more delightful. You can see the progress on the Restoring a Farmhouse series of posts.

The garden as it was. This was the entrance to the property.
What we started with when we purchased the old farmhouse. First time working on the garden. What a lovely mess!

I am very happy because a small garden center opened in our area, and now we will not have to drive that far to purchase plants or gardening material. After all that hard work, our reward was my delicious version of Fiesta Rice.

I hope you enjoy this post. Love and light.

The Simple Life – Learning and Discovery

The past couple of posts under The Simple Life series have been about my experience in learning to live a much simpler life. Today, I want to write about learning and discovery. These posts are not in any particular order; it just relates to what I have experienced and the many changes I have made in my lifestyle, along with my husband.

Moving from the Jersey shore area to live in the country in Southern Virginia certainly feels very different. It is a different lifestyle but also a different culture and ways to approach and do things. People interact different with each other. There are degrees/rules of politeness in comparison to the open and fast friendly approach of the Jersey shore. Things around here move much relaxed, and also formal in certain circumstances. Overall, people are friendly, welcoming, and very polite. It is not uncommon for people to show up at your home to introduce themselves and know who you are, followed by friendly conversation. Learning to read people and customs has become part of our simple living.

In our effort to fix up the old farmhouse, we’ve had to learn many skills, although my husband has always been very handy with tools and fixing things. I have become his sidekick thus having to learn in order to assist. We fixed up 95% of the place ourselves. If you are interested in reading about it, those posts are under Restoring an Old Farmhouse. We have learned about gardening here, and plants respond very different to the weather and soil here than the sandy soil and cooler temperatures of the Jersey Shore. I had a lovely garden which did not require much upkeep, and I think that gardening is a bit more challenging in this area. There are quick temperature changes as well as weather changes. Spring is bouts of hot and cold with gusts of wind. In general, I have to be more weather alert here. Summer is very humid and hot or humid and wet, and it takes a toll on the garden. Frequent watering becomes a chore sometimes. Surprisingly, I find winters here wet and cold.

Learning about some of the wildlife was a necessity that I honestly did not think about until we had move here. Poisonous spiders, snakes, critters … all of that and more. Right now, I am having to deal with a moth caterpillar invasion; they are just everywhere as if they would fall from the sky, and although I found them cute, I don’t do well with cuteness in numbers. This week I learned that the hair in these caterpillars contain histamine which might give people a rash when in contact with the skin. The falling from the sky part is that they actually fall from trees and the wind carries them via their silk thread. Who knew? Down the shore I only had to worry about the occasional wasps and tons of mosquitoes. We had a mosquito man who drove a truck fumigating the area every year.

Black Widow under the bird bath.

The first two years felt like I was in learning mode 24/7 – people, customs, places, wildlife, housework … a bit overwhelming at times but exciting too. The most important point about all this is disposition, our attitude for learning and working together at a different pace and environment. There is much to learn and discover yet but knowing where we stand and having survived the first year of change, gives way to balance, and that is always good.

Simple living is about balance but also, the openness and readiness to welcome life’s lessons, and discover simple, good, and lovely things.

Love and light.

The Simple Life – Joyful Faith

Photo by M.A.D.

When we moved, we took a leap of faith. We knew that we would have tons of work ahead of us, limited resources, and no permanent income, as we had left our jobs behind. Looking back, it was a stressful period; however, there was a degree of excitement, unpredictability and change, but mostly, we operated on faith. I think that part was the one that counted and kept us going until we finished the job. I will not pretend it was easy, totally the opposite, but our faith in the Lord Jesus kept us going day by day, from sun up till’ sun down, and the job was done. We would wake up before sunrise and head back at sundown, every single day. We had to make a dilapidated house a home in a short time with a very tiny budget (You can see our progress in Restoring an Old Farmhouse series of posts).

It is easy to forget challenging times when things flow to our contentment and life seems balanced. Living a simple life draws a great deal from living by faith. Learning to trust that all things work for the best to those who trust in the Lord is part of it.

Romans 8:28“And we know that in all things God works for the good of those who love him, who have been called according to his purpose.”

Knowing that when the future seems far away, and things are not as perfect as one would want, faith bridges the gap and brings what is needed to accomplish the task at hand, whether one has energy or not, resources or not. Somehow, it all falls in divine order, one step at a time, one miracle at a time. The simple life is full of small miracles day in and day out. Joyful faith keeps all the essential pieces of the puzzle together until one is able to see the whole picture. Living in joy and by faith, even when things are in disarray for a season and not as perfect as we wish, is done by keeping our eyes on a higher power and not solely on the circumstances that surround us.

In my journey, I had to learn many new things, leave many behind, and have the disposition to embrace new ones. When days seemed too long, energy and resources at their end, I took my eyes off these things and learned to trust that it would all work out for the best. It is not easy, but faith and prayer fill in the gap in those moments. Simple days are shaped by faith. As someone whose faith rests in Jesus Christ, I can tell you that I have seen the hand of God working alongside me, even when I thought I was holding on to the last string. Whatever was needed at the time materialized in a perfectly timed and orderly fashion. Today, I view faith as an intricate main part of my simple life. When in doubt, I remember, I pray, and I give thanks. Joyful Faith is another important part in living a simple life. Hope you enjoy this post.

Farmhouse Project – The Large Tree

In a previous post – Twelve Future Farmhouse Projects – I mentioned the need to tackle the very old and large tree that is dangerously close to the side entrance of the house. I loved this tree, but it was not looking good (sick), and with the strong winds and storms that sometimes make their way around here, it posed a risk, so we decided to eliminate the danger. I was sad to see most of it gone, and truly felt sorry for it; I guess I had developed an attachment to the tree, “feelings” for it. Due to the cost of cutting down a very large tree, we decided to go for a complete trim of the branches. It looks like at one-point, previous owners might have done the same. The company we hired (Southside Stump Grinding, with the crew of Cut It Rite), did a great job and left everything clean. We will be calling them back for the next tree project. It was nice to experience again good old customer service. They were punctual, fair in pricing, neat, careful, friendly, respectful of property, did what they promised, and had excellent communication throughout the process. Caleb Milam, owner, was on top of everything from the beginning. But going back to the old tree, I have to say that I miss it. One of the crew members said that it was a very old tree. The trunk is very thick, maybe like two and a half of me, and it remains, along with very thick branches, that eventually, we will cut down. For now, we have peace of mind, and that was the goal. I will enjoy what is left of this old giant, and who knows, maybe will cover it in pretty solar lights. It looks like a giant hand coming out of the ground.

The tree before. These branches did not look so thin once they were on the ground. The crew arrived at around 9 am. and worked straight through until around past 2 pm. It was a lot of work, especially because they had to be mindful of the house, the well, and the electricity cables on two sides.
You can actually peel off the bark, and there is moss growing in many areas.
Many branches starting to rot and break in some areas. Here you can see where the previous cuts were done on this tree.
This area at the bottom of the trunk (left) was what let me know it was now the time to do something. I have been watching that part of the tree separate more and more until it broke off. I guess it is part of a root.
And now it doesn’t pose any risk. I can see ivy fairy lights adorning it.

Another project crossed off the list. I hope you enjoyed this post.

Farmhouse Project – The Hydrant

This project came about unexpected and out of necessity. Unbeknownst to us, the yard hydrant had been leaking underground, and it wasn’t until we noticed a permanent wet ground that we realized something was not right. This project had to be done in several attempts, and this is why. The hydrant is an old Woodford hydrant, one of the best in the market, that will last long, over 50 years, and this one seems like it has been pumping water for a long time. I wouldn’t be surprised if it dates back over 50 years. First, we had to learn how to do the job. YouTube was a huge help. Then, my husband had to dig to find out if the problem was the hydrant or below it, the water line. Once he figured out it was the hydrant, we were able to proceed. This project was very interesting to learn. Here are pictures of the project. The first thing he had to do was shut the water off.

FIRST ATTEMPT

The hydrant was constantly leaking water through the weeping hole/valve. It is supposed to let water out after the hydrant is shut off to prevent freezing during winter.
After realizing that the culprit was an old plunger, my husband proceeded with the job. The plunger is what prevents the constant leak, and allows the release of water through the weeping hole as needed.

It was very had to get anything loose due to the many years of rust, and paint. Oil had to be used to loosen parts, and even heat. My job was to assist with tools and to hold the pipe well so it would not crack.

The plunger would not come out. It was stuck. We had to pour water through the pipe to see if it would loosen. It finally did.
This is the condition of the plunger, worn and cracked. The pipe is very rusty, but still strong, so we took care when handling it.

We bought an Universal Kit, but after dismantling everything it did not fit the old model.

The Universal Kit brings the parts for a Red or a Blue hydrant. Ours is red. Cost was $21 and change.

After realizing that the Universal Kit was not a fit, my husband had to put everything back together, and try to adjust the top of the hydrant so the leak would at least stop when not in use. A proper kit was not found in the area stores, so we had to order one online. In order to do that we had to figure out what kind of hydrant (model type) it was. It is done by looking at the number stamped at the bottom of the hydrant.

106 D hydrant model requires a Y34 kit. We ordered genuine Woodford repair parts this time. It took four days to arrive. In time for the weekend.

SECOND ATTEMPT

The right kit for a Woodford 106D model. Cost was about $18, cheaper than the Universal kit.

This time parts were a bit easier to take out; however, installing the new plunger was not. Heat and a lot of force was required to loosen up the rusty part.

New plunger installed.
New Rod Stem installed.
Replacing the Packing was not easy. It was dried up inside, worn, and came out in pieces.
Here you can see the old Packing next to the new one (top), and the old support washer next to the new shiny one (bottom).
The new Packing Nut installed; the old one next to it.
All the old parts that were replaced.

Next, my husband put everything back together. It was a process as well; this time in reverse order. He turned on the water back, tested the hydrant after adjusting the top, and once everything looked alright, it was time to cover everything back the way it should be.

The stone helps so soil and dirt don’t go into the weeping hole.
Stones add extra support and drainage.
Soil is replaced, plus another layer of stones on top. Project completed.

This process saved money, about $400.00, maybe more. It would have been simpler if we had ordered the genuine parts from the start, and forego the Universal kit. Old farmhouses come with tons of surprises. I hope you enjoyed this project.

A Few Garden Projects

Sometimes, ideas come to mind unexpectedly, and that is how a project is born. I saw a few pieces of wood that my husband had destined for the garbage and I decided to do something with those pieces. I had all the necessary materials at hand, so why not? One thing that came to mind was the UPS/FedEx truck passing our house, and turning back, and sometimes, back and forth, trying to find the address. For some reason, the navigation system does not point to the exact location; always further away. The house is set far back, so it is easy to miss. So I decided to help them a bit by making a house number sign with the leftover wood. I wanted a bit of a yesteryear look. This is what I came up with.

Materials – leftover wood, nails, and paint. The horse is one of my husband’s rejects ( he makes wooden toys …), and I thought it was the perfect thing to add.
I decided to spruce up the veggie garden. I made a cross with the rest of the wood, and added a homemade banner made from vintage fabrics and antique clothespins.

In the meantime, my husband was reconsidering his previous trail sign, scrapping it, and making another sign.

He likes this style better, and so do I.

What happened to the other sign? I placed it on the veggie garden. Unfortunately, the plants are not growing as fast this year because of the heat and lack of rain, even when alternating watering. Even the lettuce is not producing as well as last year. The peas dried up and died.

The red box is in need of painting already; probably next year.
This onion plant is like a piece of art – a sculpture.

These projects gave me the time to reminisce, and enjoy the work.

BEFORE – Sometimes one has to look way beyond the scrapping wood.
AFTER – We have come a long way from when we started; small steps make a difference.

I hope you enjoy this farmhouse project. Next project will be the rebellious hydrant. Parts are on order; who knew that Universal fit is not really Universal?