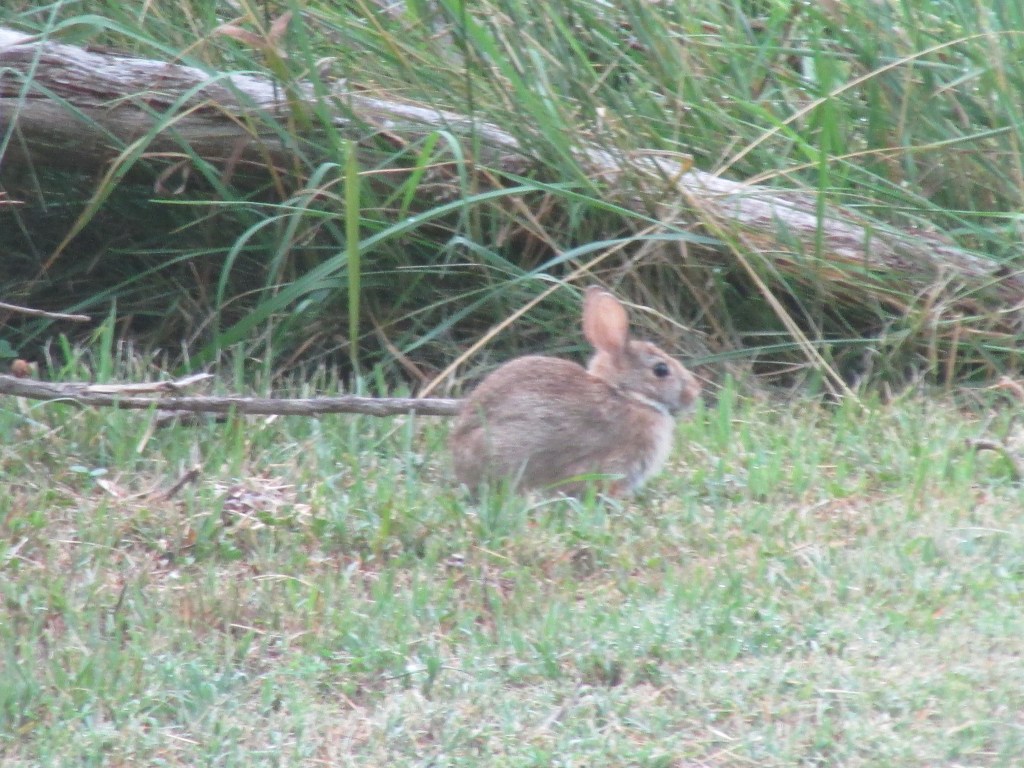
Nature never disappoints. I was able to capture a few images of some visitors. It has been hot and dry around here, the garden is growing slowly, even lettuce is taking its time. I do what I can to provide these visitors with some comfort, a birdbath always filled, small plates of water for ground critters, and areas in the garden for them to enjoy shade. Here are a few of the visitors.
I am not sure what kind of bird it is, but the colors are beautiful, and it is a larger size, larger than a Robin. The first time I see this bird around.
Bunnies have not been around as much as other years, neither do turtles, or snakes. I am not sure why.
Crows, Ravens, are a plenty around here.
BEFORE -The wood around the garden was in need of painting. I had leftover paint, so it was a quick an easy job, under an hour. We have been painting what needs to be, keeping up with time.
AFTER – The wood is shiny and bright again, at least for a couple of years. $$$Tip – If you want to save on garden wood/logs look at discounted wood, usually found on pallets around the garden section in home improvement stores, or the rough cuts in mills. This is how we did the entire perimeter of the house. Once you paint or stain it, the wood will look great and will last long.
Next project will have to be one that just popped up – fixing the hydrant, which has been leaking, unbeknownst to us. It requires digging, so it will be a learn as you go project. Hope you enjoyed this post.
There is plenty to do around here; never a dull moment. We armed ourselves with motivation to tackle a short list, mostly things that have been waiting – installing a window a/c for when the heat becomes unbearably dangerous, weeding out the garden, trimming bushes, planting corn again (something plucked all my corn plants, one by one), caulk porch columns, and do some minor painting retouches. The caulking and the painting had to wait because of rain that never showed up during the day, but poured at night. We will tackle those later on. However, I was able to do a quick and easy project with left over materials – a bird/critter feeder, and my husband was able to work on something for his trail project.
The bird/critter feeder was something that I thought of buying but instead I decided to give it a try by using some recycled items – old metal cookie plate, leftover 2×4 wood, and foam planter bottom. It was quick and easy, and it works – zero cost. We gave the wood a coat of paint. The planter bottom serves to prevent weeds and to keep it clean around the base. My husband drilled small holes on the metal plate for draining the water when it rains. Eventually, I might plant some flowers at the base. Could not have been easier.
Homemade bird and critter feeder.
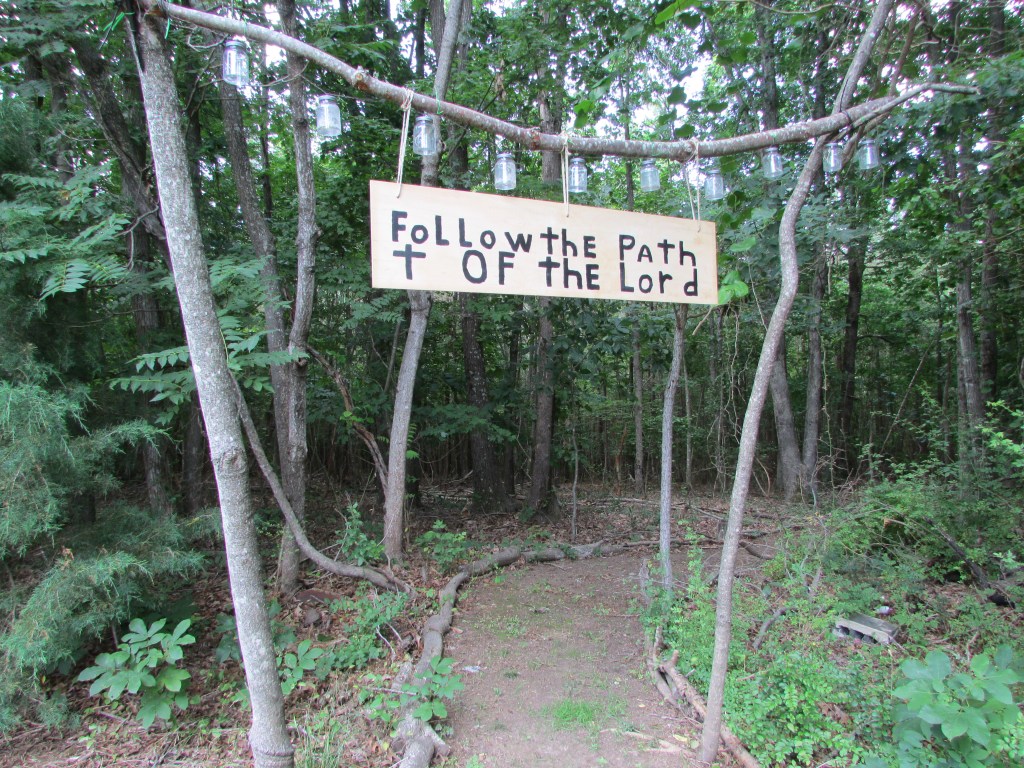
My husband decided to make a sign for the lighted trail entrance. This is a project that he started last year, will be time consuming and hard work, but he is obsessed with it, and will work on a small part of it when he gets a chance. My vision for it was two 4×4 poles with a wood beam across and a burnt wood sign in the middle, but he wanted to go the more natural and less expensive route, and use the trees already there; after all, it is his project, not mine.
This time he added a simple homemade sign. He plans on having two more entrances and an exit.
There is always time to admire favorite plants, and this garden has come a long way from the morass of abandoned overgrown vegetation it was.
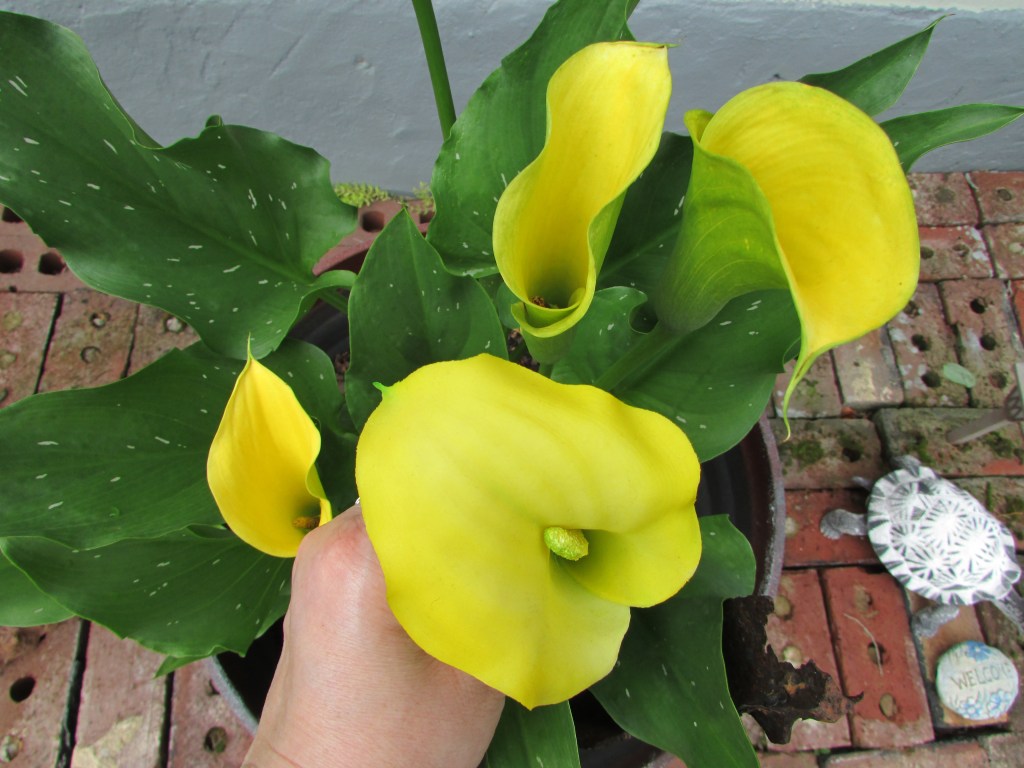
Can you guess which Calla Lily is not real?
Love the color of this one. I leave the bulbs throughout the winter; they come back, and the plant comes back stronger and fuller. This is the third year.
Another lovely color.
My favorite shade of blue.
We will continue to add to this garden; it has been a labor of love. I hope you enjoyed this project.
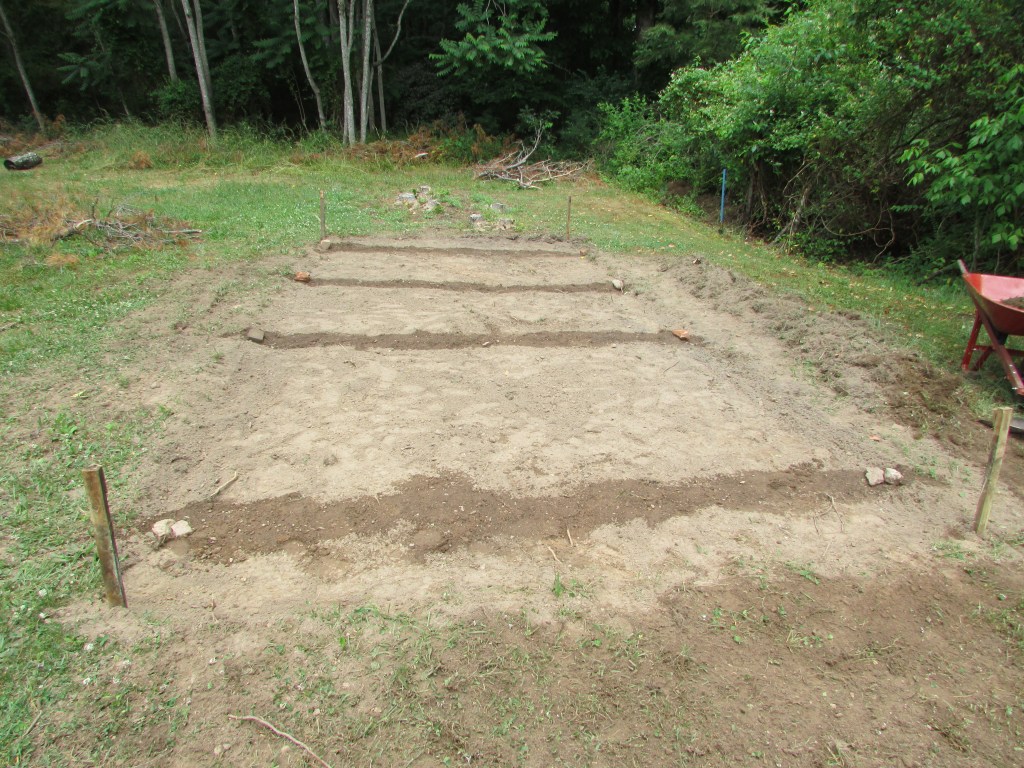
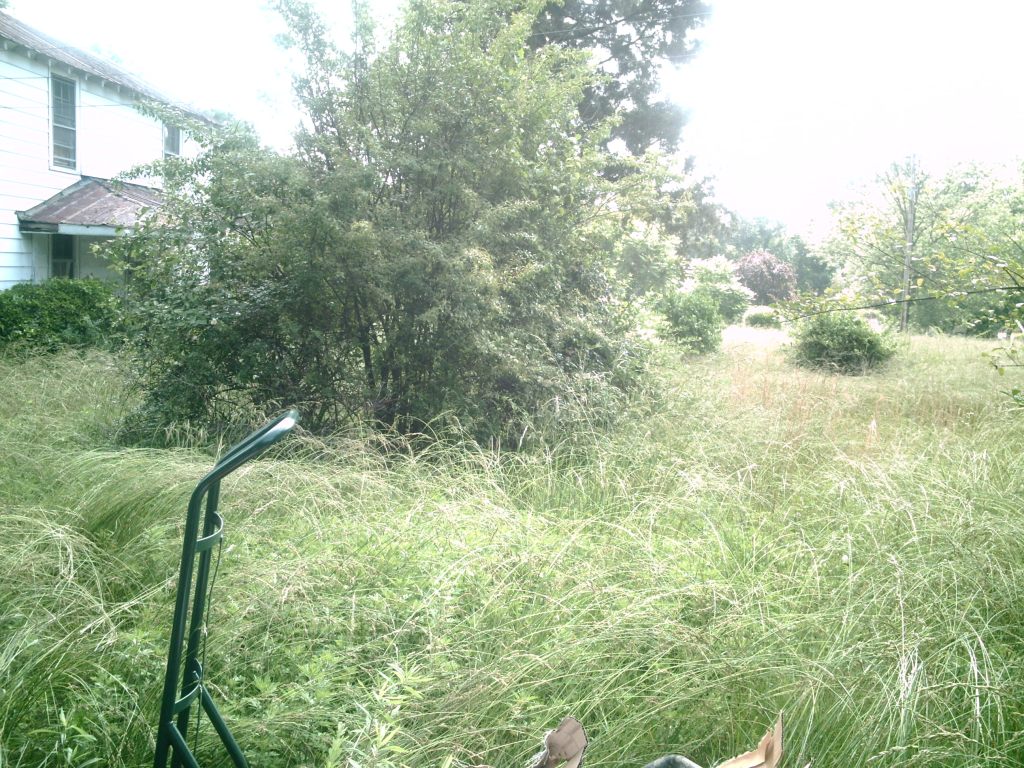
We had plenty of rain over the past two days, so in the interim, we were able to tackle one of the projects from the immediate list – opening up an area in the back part of the property for pumpkins or other veggies . Last year, we tested a small patch of grass where we were able to grow a few pumpkins and cantaloupe, not many. We realized we had to move the planting a bit to the front, where there is a bit more sun, so we finally settled on the area. We took advantage of the very wet and soft ground after the rain, and we finished the job quickly. The seeds are planted. Only a few rows, just for a second test to see how it goes. This year we planted a few seeds – pumpkins, cantaloupe, sunflowers, and a bit of corn. Not too much because we are still testing. Here are a few pictures of the project.
Clearing up this section was easier than we thought because of all the previous rain.
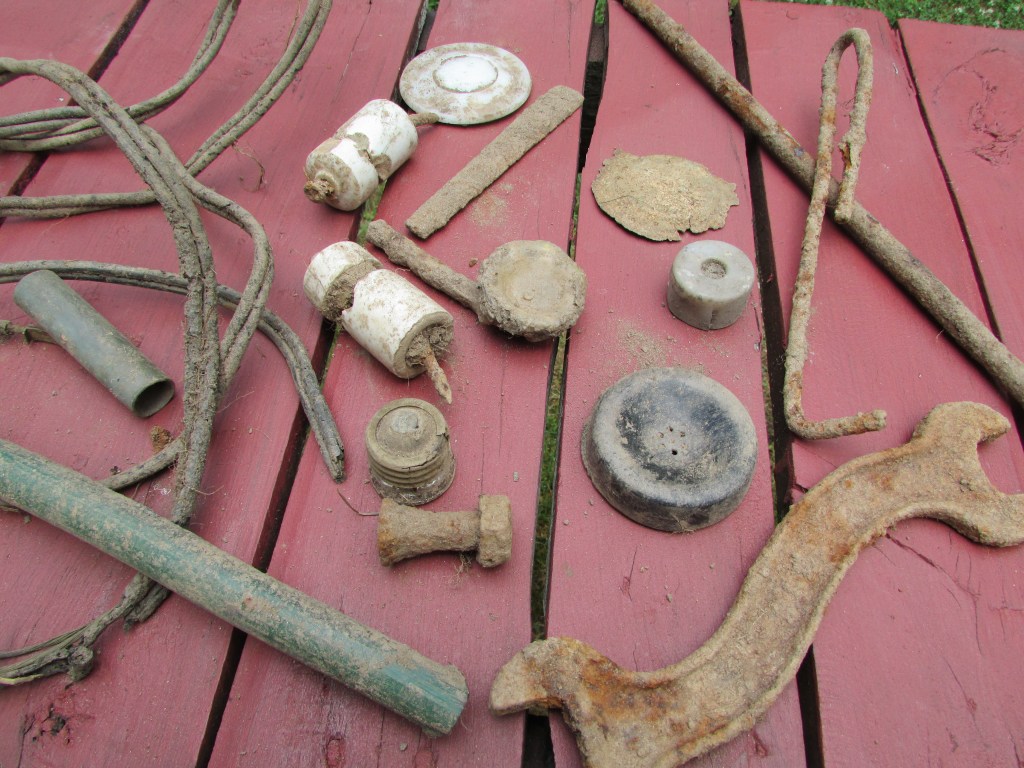
While digging out grass, we found all of these interesting objects. Mostly, old electrical parts and tools, bolts … I wish I could have a window to the past and see the story attached to each one.
Of course, these will end up in my collection. Why? Just because.
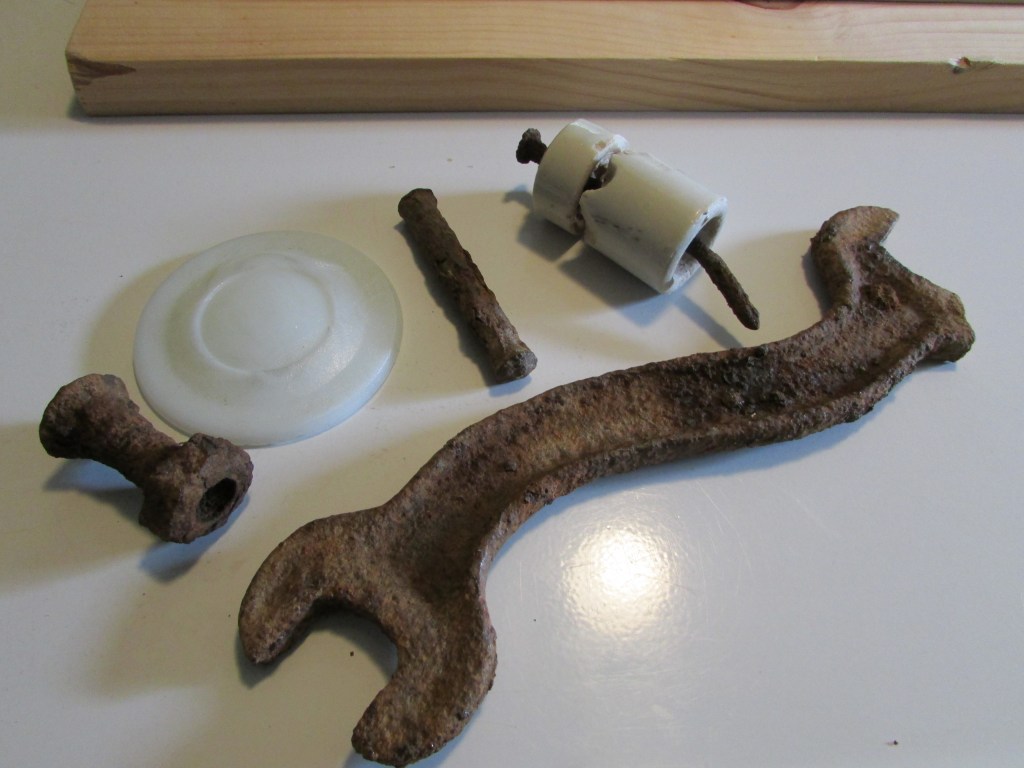
And here they are; in their rightful place. It has become an obsession that doesn’t require an explanation.
After testing this area, if it works out it will be expanded a bit to be able to plant more, and added to over time. I am sure that we will find more interesting things buried in the soil. I hope you enjoyed this project; I surely did.
It started last week when we restored a couple of old garden statues on a rainy day, and we decided to continue with a task that has been put aside for a while. While my husband tackled the remaining garden statues to be painted, I decided to restore the old porch chairs that needed a little TLC. The weather has taken a toll on the finished wood, but the chairs were still sturdy and solid. We already had the paint and materials around, so all we needed was time and effort. It is easy to discard something when it starts looking weathered and old, but it is not necessary at all.
These were a gift from a good friend for our first house, which makes them over 20 years old or so. When we moved, these came with us.
After my husband cleaned and painted these, the garden statues look great again. I think these can withstand a few more years in the garden.
This tired old chair is in need of some love.
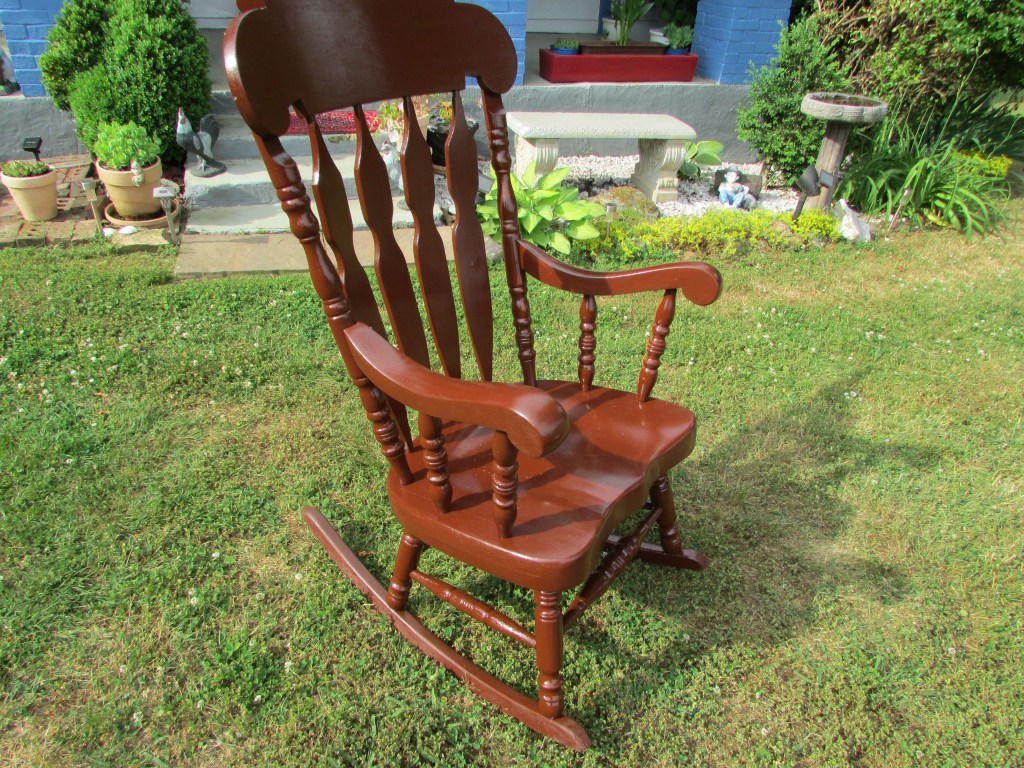
All it needed was a light sanding, dusting, and a coat of stain.
This chair needs some attention before heading to the dumpster. I ask myself the more than one life question – is there still life left on it? If the answer is yes or maybe, then it gets the attention it deserves.
These chairs cost over $500 if bought new. Because we already had at hand the materials we needed to restored them (leftover stain, sanding paper, rag) the cost is $0.00.
Before discarding something as not useful anymore, ask yourself the “more than one life” question. If the answer is yes or maybe, go for it, and give it that life, restore it to beauty and good use once more. In the end, your pocket is happier/fuller, and Earth will thank you.
I know that there are things on our To Do List that should have priority, but sometimes, we cannot help it and an idea just hits one of us and we both run with it. This little garden project was born in my head while sitting on the porch as my husband was talking about things he would like to do around the future rain garden. He liked the proposed change and we went with it. One of the front bushes was looking sad despite many attempts to make it become more full. It wasn’t working. It was one of the original bushes we uncovered and tried to make healthier. Here is a picture of it.
It is the bush on the far left.
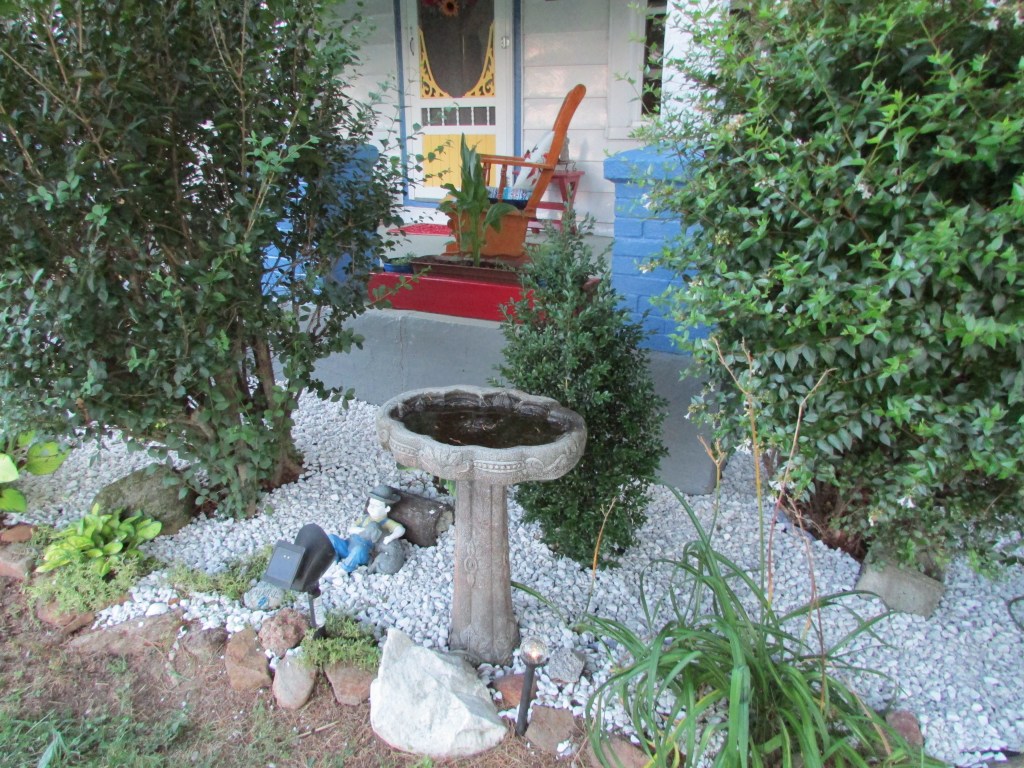
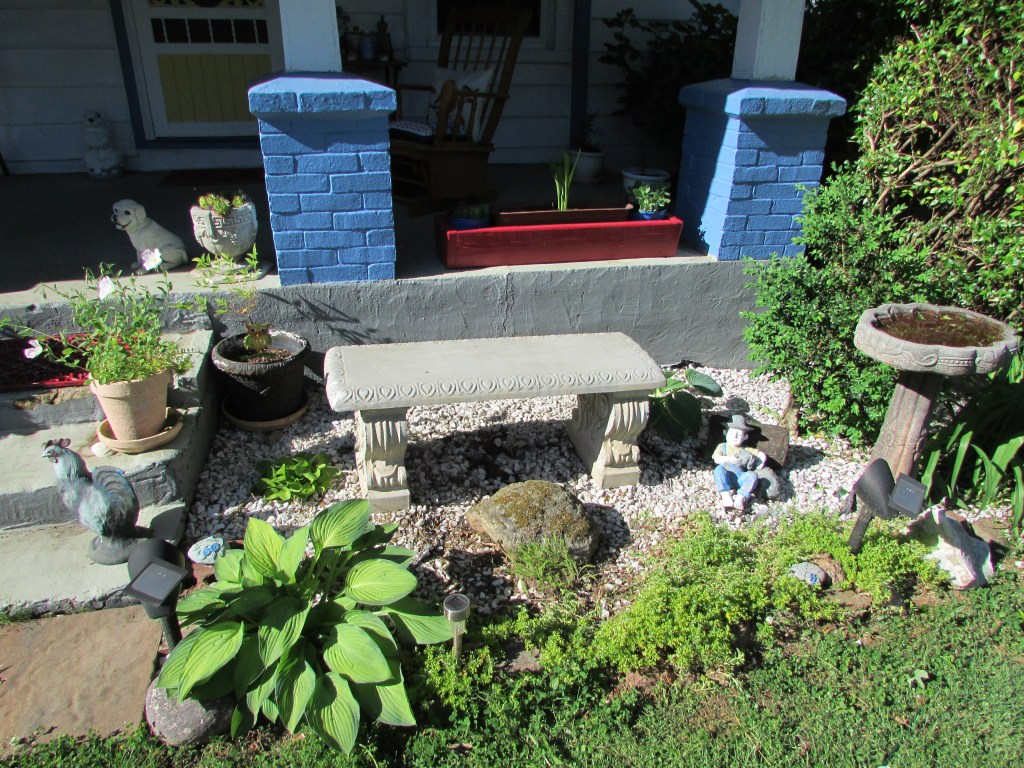
After trimming it very low to the ground to force it to fill up a bit, it did not do that, so we decided this year to remove it and move one of the stone benches on the porch to that area. Here is the result. We like it better that way. We thought it would be a difficult task to remove it, but to our surprise, it was very loose and came out easily. Maybe this was the reason for it to look a bit unhealthy.
The small boxwood by the bird fountain is still recovering from the large branch that fell on top of it during the ice storm.
Once you start you just keep moving, so my husband decided that he wanted to try something – moving the porch hanging solar light to one of the entrances that he is cleaning up to continue a few short trails. I thought about moving the solar light somewhere else but was not sure where, so that worked out.
Here is my other half working on his idea.
The solar lights are hanging from the branch he attached between two young trees.
We had to wait until twilight to see the result. The mason jar lights twinkle so it was hard to take a picture. I can see them through the kitchen window as I do dishes. Eventually all three entrances will have solar lights.
From there it was natural to move to something else, so I decided to make a little habitat for garden critters at the Faerie garden. I repurposed an old table stand and used it as a small trellis for an ivy, and under it I placed one of the chimney halves I had found before. As the ivy grows and becomes fuller it will turn into a cozy retreat for critters.
The idea is for the ivy to cover the entire structure and for garden critters to use it as a home.
As the garden wakes up, we keep helping it look better every year. This section is looking better after tending it with hope, working with the existing area, and adding a few things.
More irises have grown. Once the irises die, pink flowers come up, and after those, white ones, followed by tiny yellow ones. There is something blooming always. Originally, this area was an old trunk under grass and overgrown bushes. It has come a long way.
All seeds have been planted on the veggie garden area, and they are coming up. The seeds for the flower circle are planted as well, and hopefully, we will be able to clear an area in the back for planting cantaloupe, corn, pumpkin, and sunflowers. That part requires a bit more work. As the garden grows and changes we also grow and change with it.
About ten years ago, my husband and I bought an abandoned old farmhouse that was dilapidated and almost buried under a morass of overgrown bushes, grass, and trees. It wasn’t until five years ago that we moved into it. It took some money, time, and a lot of work to make it livable, and there are many areas that still need to be addressed, mainly exterior work. It has been hard work, and I mean, real hard work. Because we did not count with a large budget, we had to do most of the work ourselves (about 95%), just the two of us. We continue to work together in some outdoor projects, slowly, as the budget allows.
Will we do it again? Although a simple question that requires a yes or no answer, I find myself unable to answer it in such way simply because it has been quite a journey. A journey full of bittersweet moments – great moments, exhausting moments, unnerving moments, proud moments, and moments of faith as well. We both have learned so much – about ourselves, about working together and our working styles, about new skills, about the house, about appreciation and gratefulness, about our limits and disposition, and much more; but mostly, about trusting the Lord in our everyday lives. This is why a simple yes or no answer does not suffice.
In the practical sense, a bigger budget would have made things easier and faster – hiring people, easier/better materials and tools, and overall contracting out the hard work areas, and only dealing with the fun tasks. Ideally. However, we would have not experienced and learned as much, grown with the project, and appreciate it as much. It was hard work, but also fun. We would have done some things in a different way, but other things in the same way we did. Overall, I think the experience built up character, but also faith. In that sense, it is a step up from where we started. The long and hard working hours improved our physical stamina but also our mind; the overall experience, our souls. We will continue to work together on this old farmhouse and will share some projects here.
So going back to the yes or no question – will we do it again? I will answer the question for myself, but I think my husband feels the same way about it. The hard work was physically taxing but the overall experience was worth it. If you would like to take a look at the progress so far, please check out the “Fixing an Old Farmhouse” series of posts on this blog.
My latest post was about The Christmas Tree Project which we did last Saturday. While we were waiting for the moment it lighted up we had many autumn chores to do, and it translated on time going so fast that we hardly noticed the long wait until sunset. Around here, autumn means tons of cleaning up before winter or the first snow, prepping certain areas, and getting ready for future chores during early spring, so I figured I would share some of those.
Cutting the grass and blowing out leaves usually takes my husband the whole day. Once he is done, he sees another thin layer of fresh leaves that has just fallen. It is the never ending autumn story, but they look gorgeous when the entire grass is covered and one sees the many colors of the leaves on the ground, like a multicolor carpet.
Blowing out leaves and cutting the grass for the last time before winter takes priority. This is the fifth time for leaf blowing.
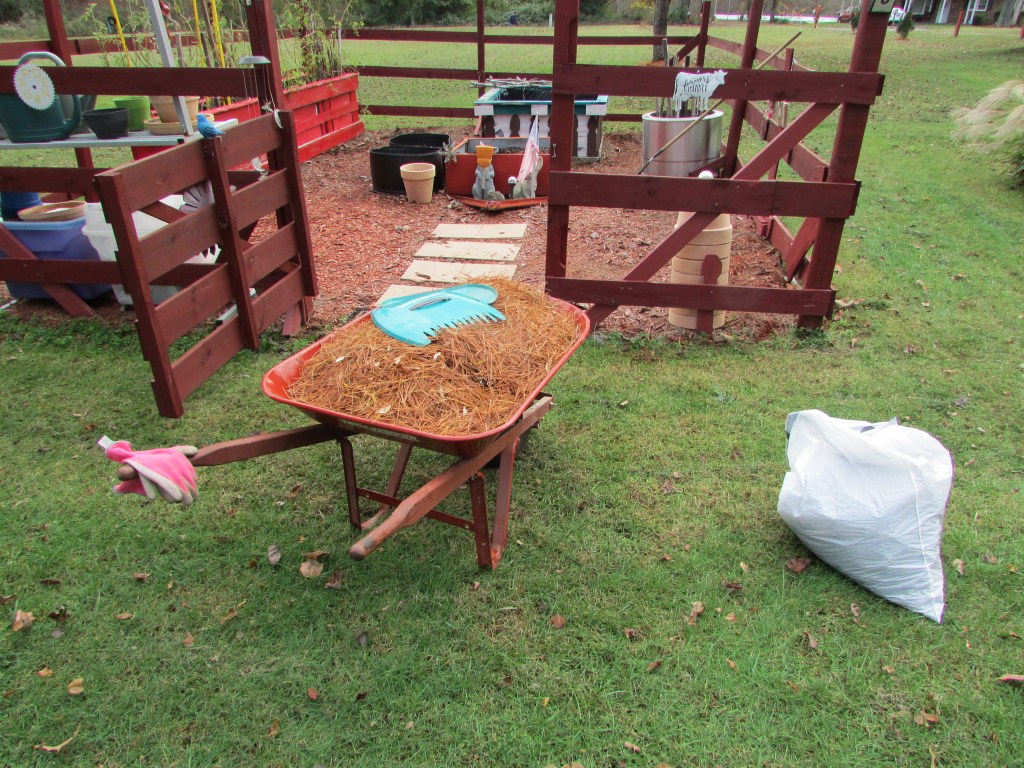
While Eddie took care of the grass and leaves, I took care of cleaning up the veggie garden, and collecting pine needles. I do this after I pick the last of the veggies and before the first snow.
Leaves are picked up, broken things go in the garbage, pots are emptied, collected and stacked in one area, large containers are cleaned up by removing dead and dried up plants, stakes are collected and placed in one area, and the remainder thin layer of mulch gets a refresher by using the collected pine needles. It prevents the cover underneath from breaking off. Overall, it gets a good cleaning.
After everything is done it looks like this.
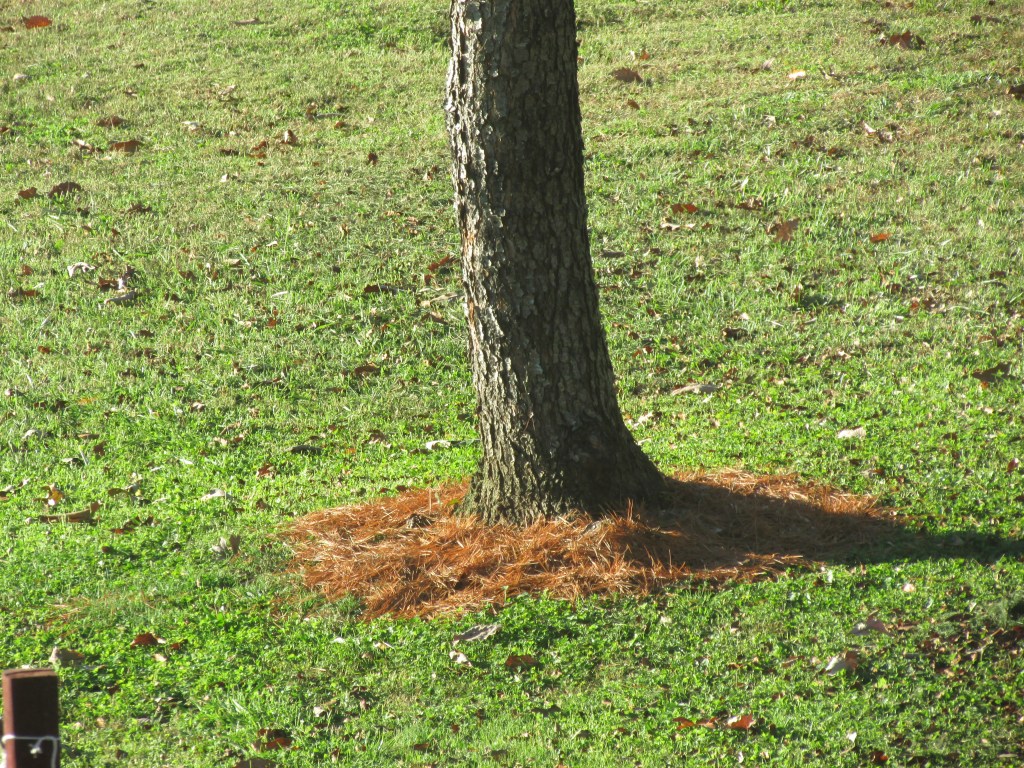
After the veggie garden is done, the remainder of the pine needles is used as mulch for some trees. It protects them in the winter, and also looks neat. We are lucky to have cinnamon color pine needles from two pine trees in the property. They do put out a ton of them. Also it saves us money as we don’t have to buy too many bags of mulch. Bagged cinnamon pine needles are expensive, so I am very grateful to have them available here. A box of pine needles that might cover 240 sf will cost about $135 dollars.
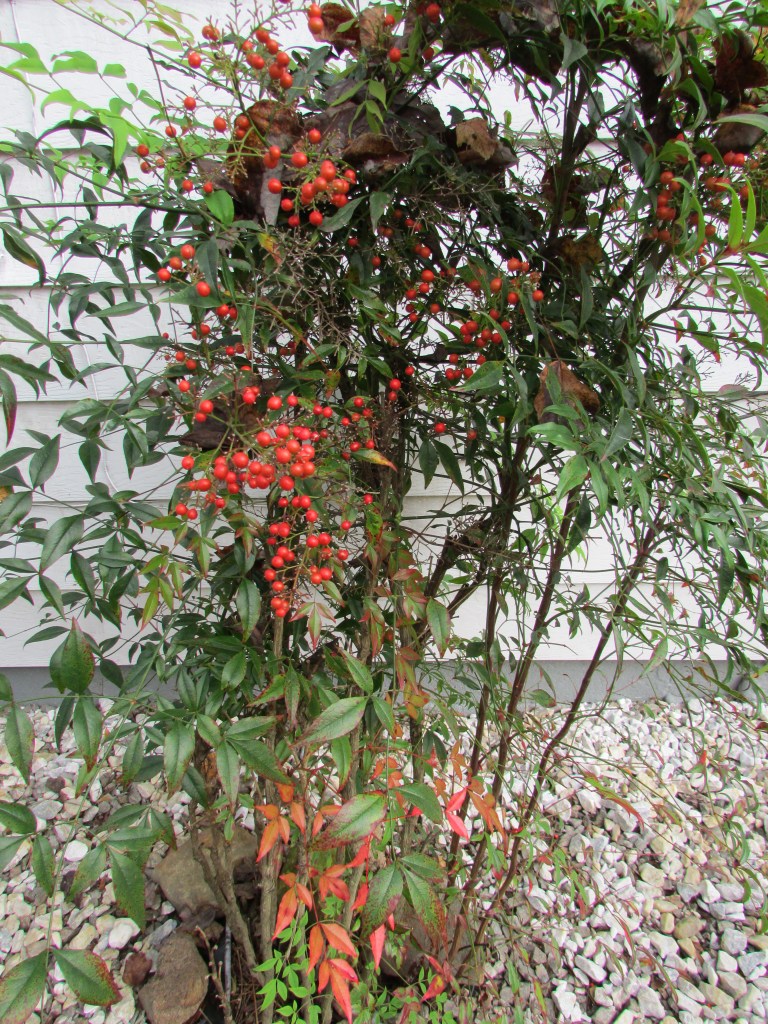
While cleaning up the rest of the garden and removing a few weeds, I find expected seasonal gifts, such as the changing of the leaves on this shrub and the beautiful berries it puts out every year. This is one of the trees we uncovered and saved when we first started bringing life back into this garden. It will become an orange-red color. During the spring, it turns back to green and instead of berries it puts out cluster of sprigs with tiny flowers.
While cleaning up the garden, I also found the unseasonably unexpected – new flowers on the forsythia bush and a few buds. Is this a sign of a mild winter ahead? Last year, we had a mild winter and this bush flourished very early.
By the time we had our lunch break, and finally, we were both done with our chores, it had become dark and our reward was awaiting to be enjoyed.
In a previous post, I mentioned twelve future projects we wish to be able to do around the farmhouse. The easiest one on that list is what I call The Christmas Tree. It was my husband’s project, and his obsession for a while. The Christmas tree is a young pine tree he was able to save when we took down a morass of weeds and overgrown bushes covering the front and part of the side of the property, near the entrance. He liked the tree, although it was in bad shape. I thought it would not make it because it had been sprayed by the city (or our electric company) with something they use to kill anything that would be a threat to utility cables. Although this tree was not nearby, when they sprayed some trees that were, some of this brew got on it and it burned some of the branches. The other trees dried up and died. Those were not on our property, but next to it. Once we had cleared out the bushes and weeds, my husband kept mowing around the tree, and trimming it. Eventually, he wanted to put white lights on it and make it a focal point. A few weeks ago, I noticed that the tree was looking much healthier, so I ordered solar lights for it without my husband knowing, as a surprise. It still has some brown spots and dead branches, but I think it will become a beautiful tree.
This weekend we were able to work on the tree. We even named it. We named it Christmas. Here are a few pictures of this first project.
First, we trimmed some dead branches and cleaned up the trunk a bit. You can still see some of the burnt branches.
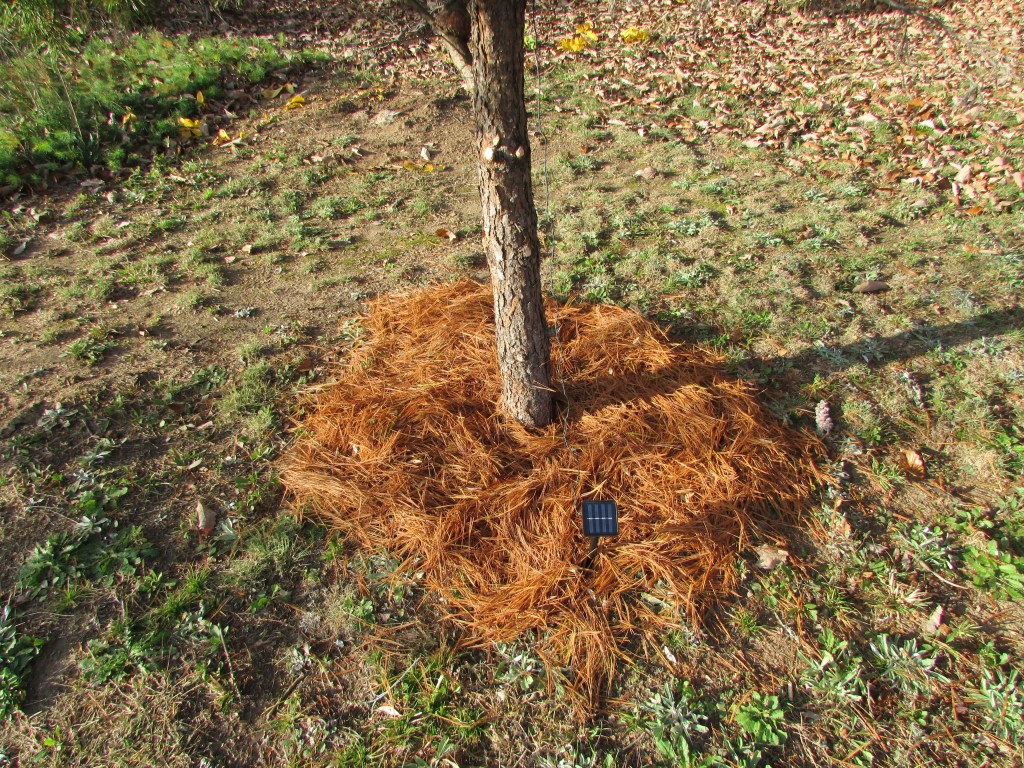
We used some cinnamon color pine needles we collected, and used these as mulch around the base. We placed and secured the lights on top as best as we could and tested them for best sun exposure.
We took care of other chores until it became dark. It turned out to be a gorgeous sunset and evening.
And then we saw it happen; Christmas lighted up. It is a bit difficult to photograph all the lights because these do not light up at the same time. We used 200 white LED solar lights.
On Sunday, we visited it once more, and we love the way it looks. I think it turned out to be a very special tree. I think this tree found its purpose. As it becomes more beautiful with time, it will light up every night, and become a beautiful sight for those who pass by. Because we are not able to see it from home, we will visit it from time to time. I might place a bench nearby. Sometimes, things may look hopeless, but with a little bit of care and patience they turn out lovely.
For every house is built by someone, but God is the builder of everything.
Hebrews 3:4
The previous posts on “Fixing an Old Farmhouse” series gave an idea of where we are as far as how much work we have done on this 1910 farmhouse. We started by clearing and cleaning up the outdoor spaces, followed by fixing up the interior of the home, and now we find ourselves going back to focus on the outdoors, as there are many things we have to handle. This post is about those future projects, which will be tackled little by little, as this has been and continues to be a cash-only renovation, hence why it takes longer. Patience is a virtue.
The Roof
The most expensive project will be the installation of a new metal roof. This is a task for roofing professionals, and we wouldn’t take a chance with it. Any slight mistakes would eventually become expensive issues. For now, the roof is coated and will last a few years.
The roof as it was when we saw the place for the first time.
The same 110 year old roof after coating.
Dangerous Trees
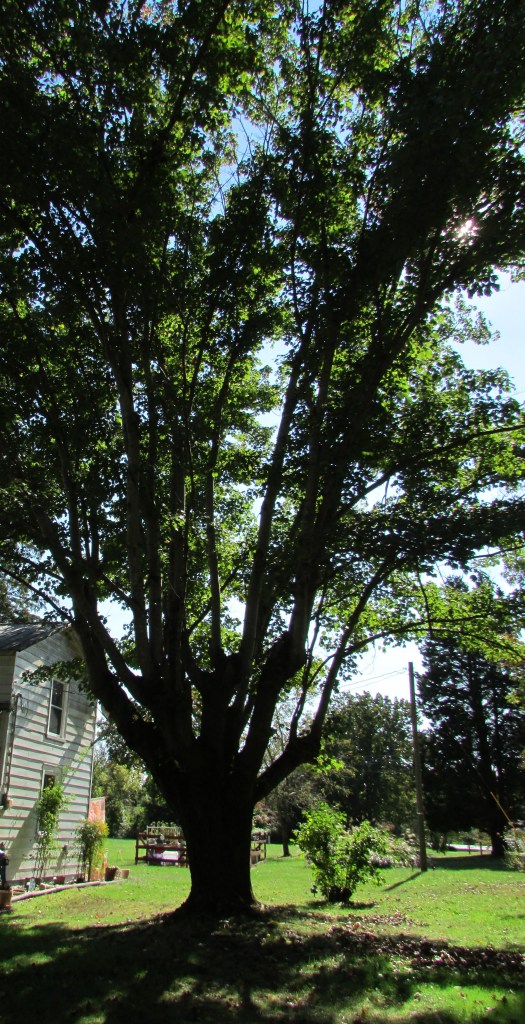
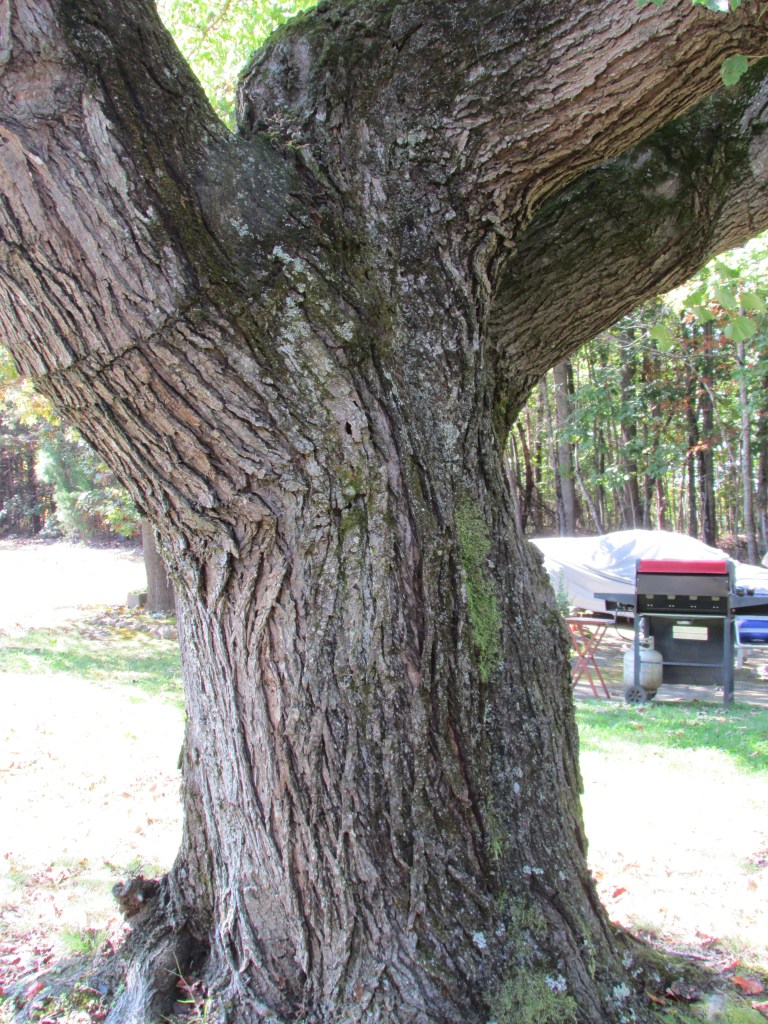
Another important project is the removal of an enormous tree that is not looking too healthy, and is in proximity to the house. We have two other dead trees to remove, large but those are far away from the house. This is another project that is a bit expensive and must be done by tree experts.
Large tree next to the side entrance.
As you can see, it is massive. It is covered in moss, which is not a good sign.
The tree has many areas like this one.
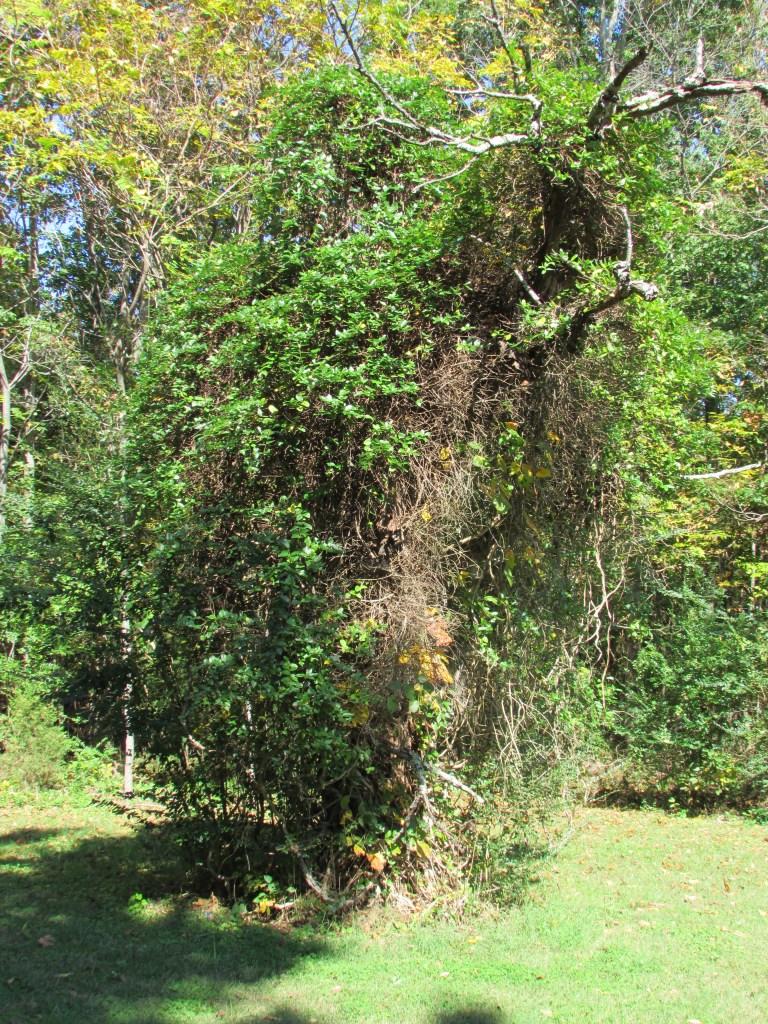
This is another tree that is dead and must be removed. It is big.
Unfortunately, the third tree is my beloved monster tree. After a much dreaded discussion, we agreed that it would be best to remove it. Poison Ivy is growing wild inside and around it, and it is very difficult to remove.
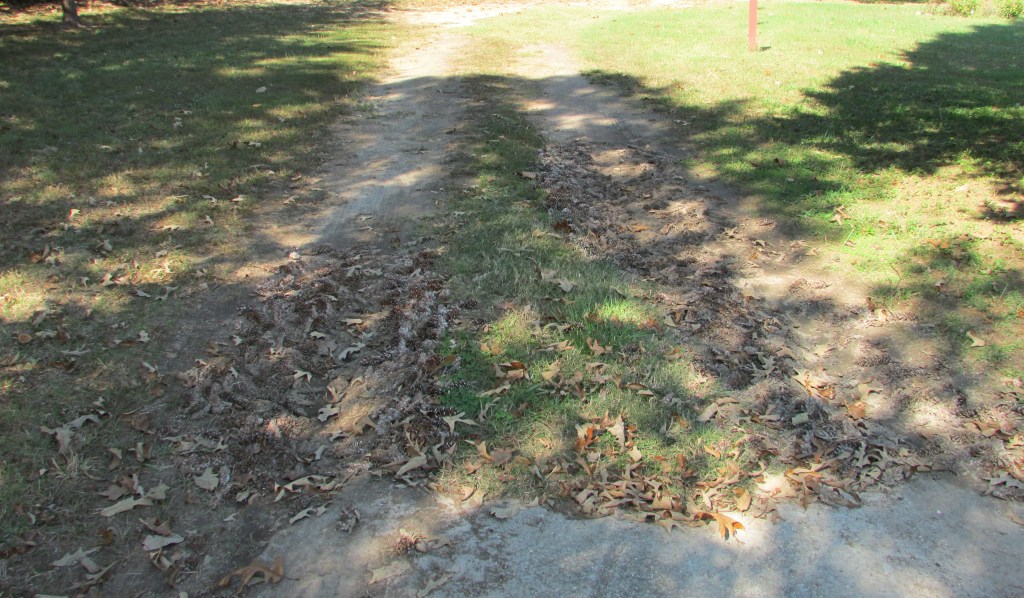
The Driveway
Another item on our list of outdoor “must handle” issues is the driveway. Over time, the soil changes. When it rains the driveway becomes very muddy with two large areas that retain water. A couple loads of gravel should take care of the issue. For now, we have been collecting pinecones and pine needles from the property and placing them in the problem area. It works temporarily. In addition, we have to patch the old cement part that was uncovered.
Not a pretty sight now, but worse when it rains.
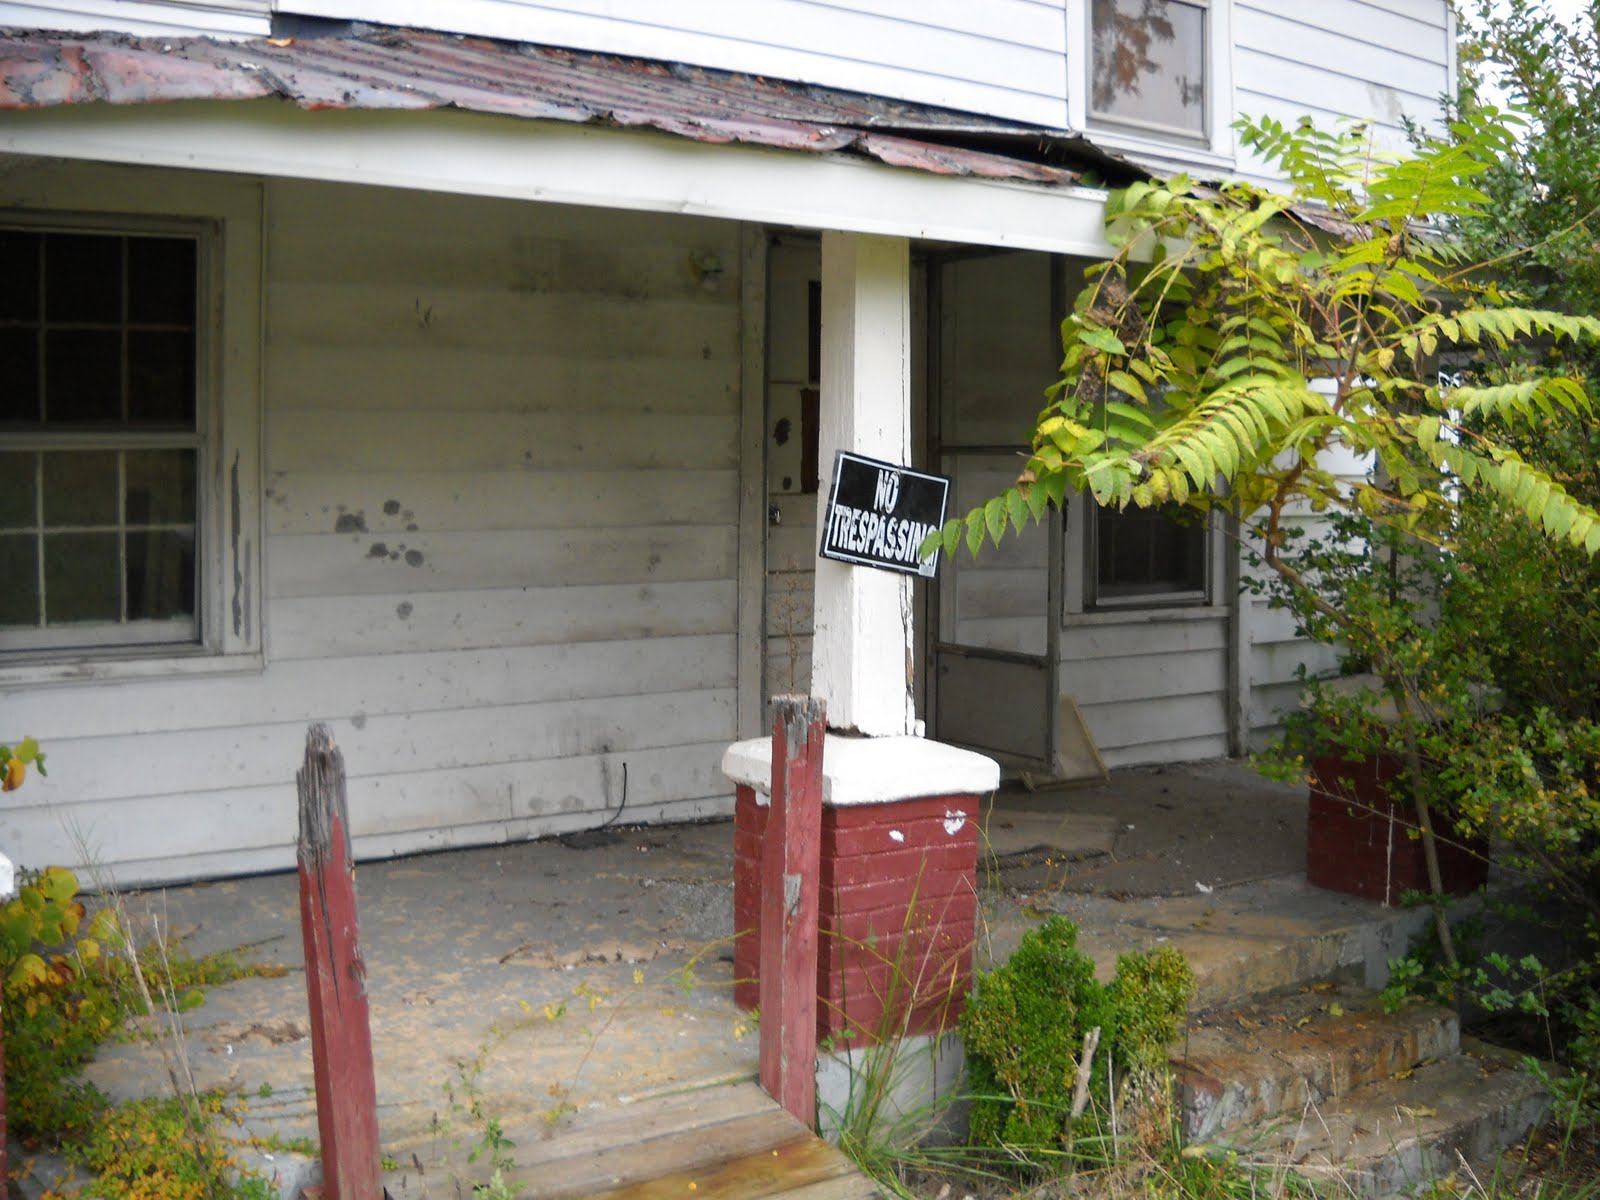
The Porch
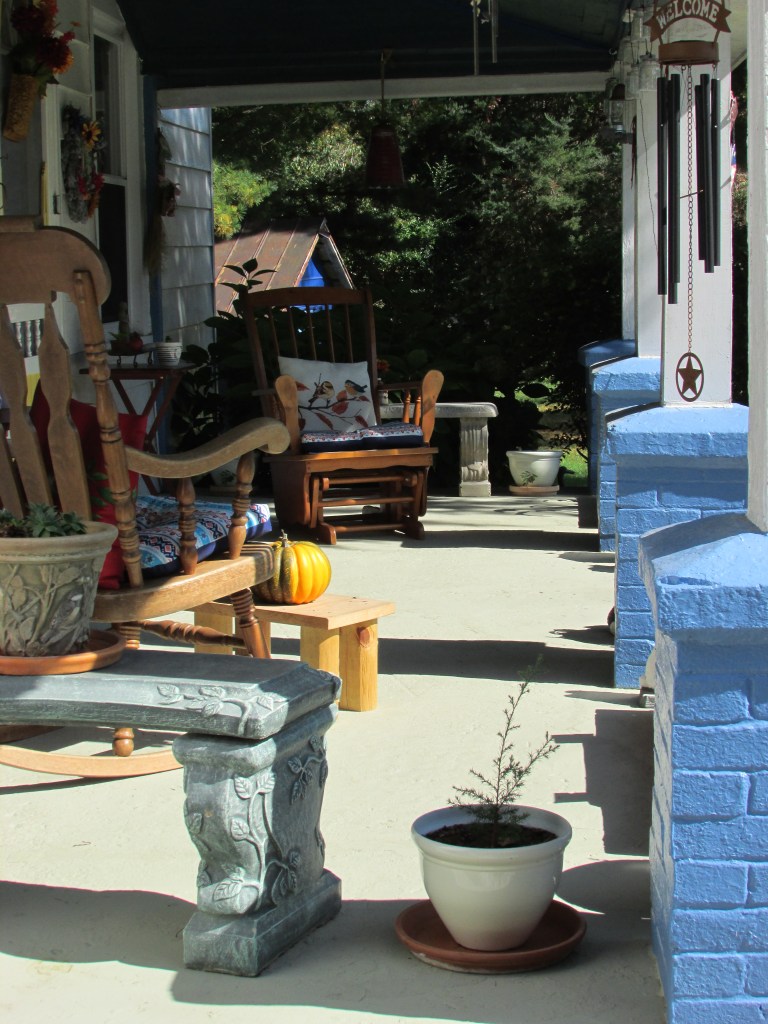
The porch ceiling needs to be repainted eventually. The cement floor needs to be tiled to prevent further deterioration. Right now, it is cement that we fixed, patched, and painted. Ideally, I would like to place slate tile or brick on top.
What it used to be when we bought the place.
For now, we maintain it until we can take care of it properly.
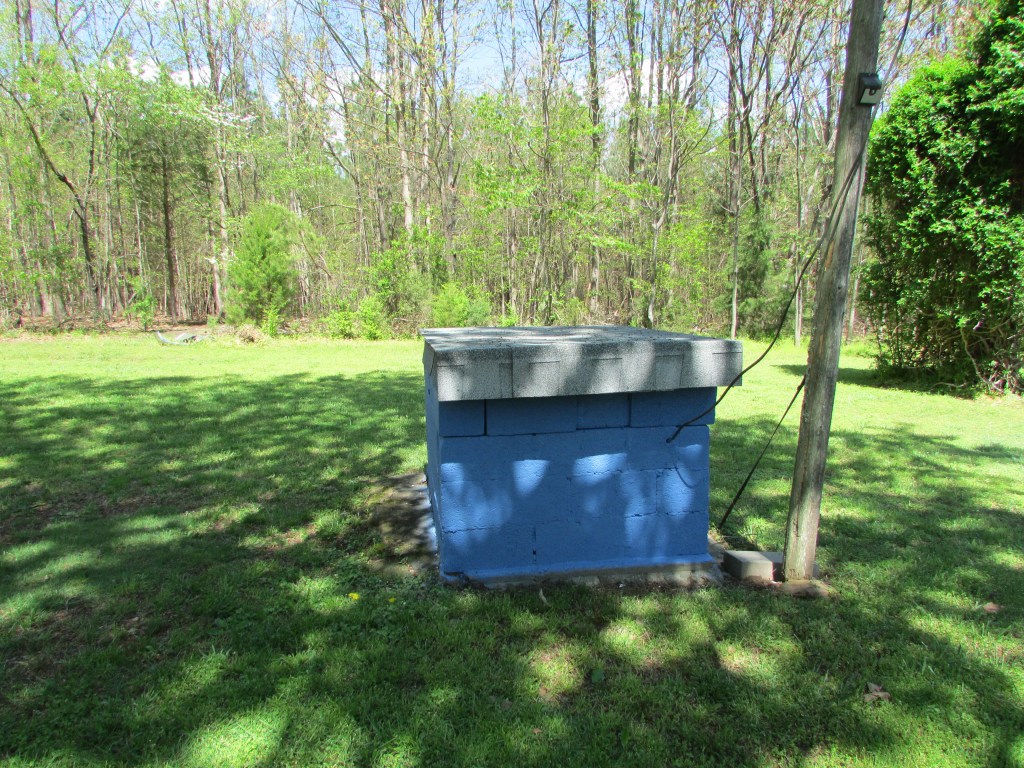
The Well
The well has come a long way from what it used to be. We would like to enclose the well with a small shed-like structure. It will provide more insulation from the cold weather. So far, we fixed and painted it, but it needs that extra step.
It used to look like this.
Now it looks like this, an improvement.
Large Shed/building
Although we have two small storage sheds on the property, one of them an existing original old log building, those are being used to store garden tools, heat pellets, and other outdoor items. We need a larger building where my husband can work on his wood projects. This will be its future site.
It will be located at the far end, and we will probably build it ourselves, depending on wood pricing – ready made kit vs. building it from scratch.
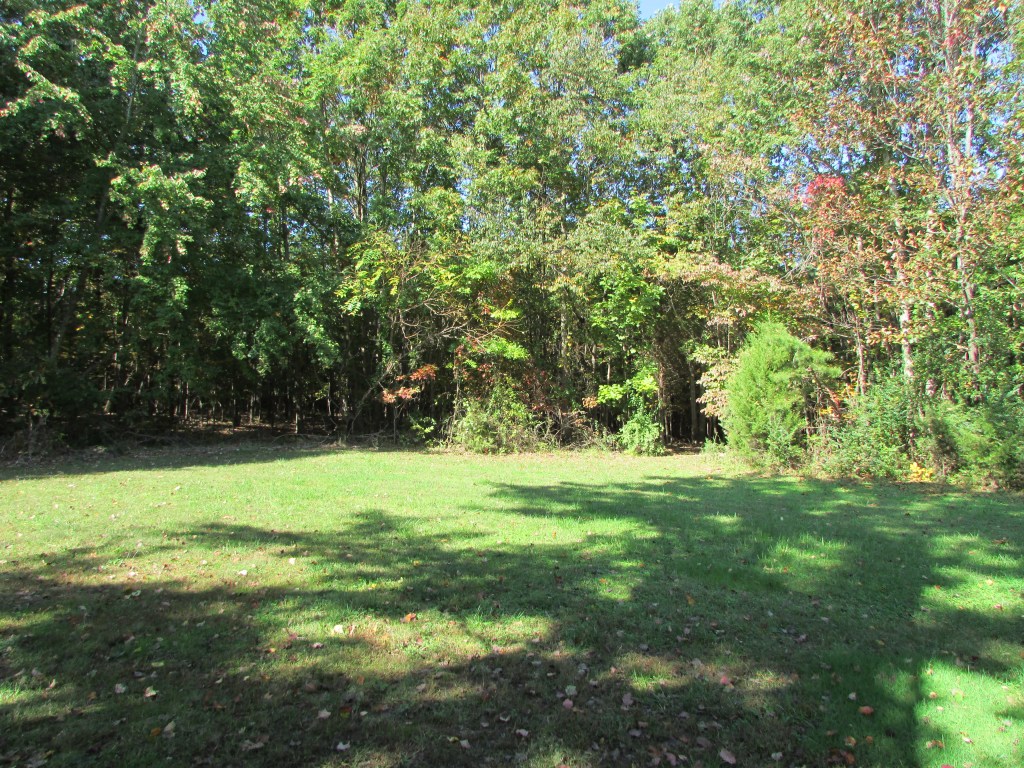
Pumpkin Area
We need to prepare an area at the back (right side) of the property where we can grow larger things such as corn or pumpkins. We tested an area this year, where we grew pumpkins and cantaloupe, and it seems a good area for that purpose. Although we will not enclose it, we will have to clear some stumps and grass before planting.
Future site of the pumpkin area. Those stumps were trees that we cut down, and will be removed.
The Christmas Tree
Last year, we cleared and cleaned up the area at the entrance of the driveway. It was full of overgrown shrubs and weeds. During the process, my husband discovered a medium size pine tree that he liked, and he decided to leave alone. This tree has been growing healthy and free of weeds and is looking very nice. My husband wants to dress it up in white solar lights that can be left on year round. His obsession with this tree puzzles me, but I am going along with it, and he doesn’t know it yet, but I already ordered the lights. This will probably become the first project on our list.
This tree has become my husband’s pet.
The Rain Garden
As much as the Christmas tree is my husband’s obsession, the rain garden is mine. There is an area at the front of the house, near the veggie garden, where there seems to be a dip or slope on the terrain. When it rains, it seems to retain water. This area would be perfect for a rain garden. However, since it is at the center, I would like it to become a focal point. I am envisioning a water feature (solar, of course) a small bench, a few pavers, one or two spot lights, a few larger stones, and of course the plants. Maybe one or two stone critters as well. This is the future site of the rain garden.
In this picture, you can see the puddle of water; that is the spot for the rain garden.
Side Steps Entrance Concrete Area
Although there is grass on this area, when it rains it becomes very muddy. My husband wants to place pavers or pour concrete to minimize the muddy mess.
The area where we will pour cement or place pavers next to the side entrance steps.
The Arbor
This is a project that I am excited about, however, I am not sure if it is practical because sometimes, we bring material through the area where it would be placed. My husband doesn’t like when someone comes down the driveway, bypasses the parking area, and ends up parking very close to the house. He says that if a vehicle were to disengage the parking gear or someone miss applying the brakes on time, they would land in the living room. I can see his point. The arbor would signal the end of the driveway, and would serve as a pretty stop sign. In the past, (not around here) I have seen this happen to two people. Their cars were not in parked gear. My husband, being a mechanic, has seen this scenario many times, hence his insistence. If the arbor idea were to be implemented, wisteria would be a good choice and it would have to include an area for the name of our place – Black Crow Cottage.
The arbor would be located after the last light post signaling the end of the driveway.
The Woods Trails
I am not sure, but I think this will be the last project to be tackled. It is something that my husband wants to do in the future. He wants to create pathways around the wooded area. He wants the pathway to end where the “Christmas tree” is. He already started the three entrances, and placed a few logs from fallen trees. It will take time and effort, and he knows it, but it is something he envisions and would love to do. I like the idea, although not so much the type of work involved.
One of the three entrances that will connect to a main pathway. Here you can see that this one will lead left or right.
A section of the woods.
These are twelve future projects that I will share here when we are able to complete them, one by one, little by little. We have come a long way from where we started, and there is more to do. I hope you enjoyed this post.
The experience of fixing this old farmhouse has been everything we thought it would be and much more. We do not regret it. The last room to share on the “Fixing an Old Farmhouse” series of posts is the bedroom. Technically, this house was listed as a three-bedroom house, but currently, we use one of the bedrooms as the living room because we set up the living room as a dining room, and the other room is set as the office. You can view these rooms on my previous posts.
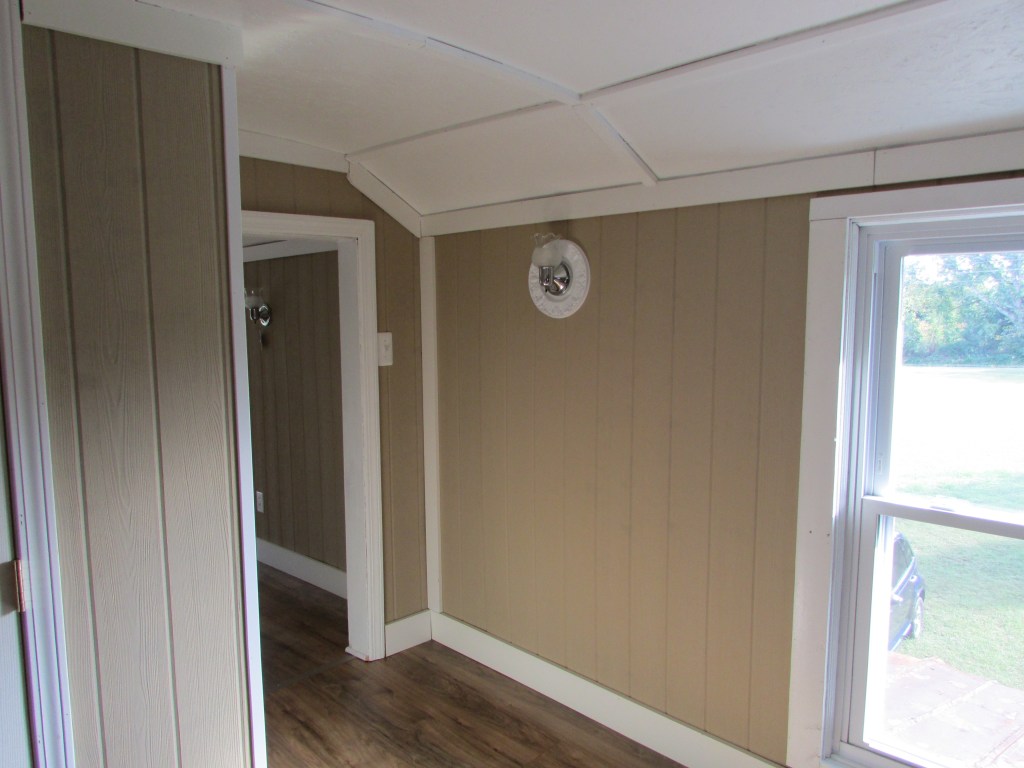
The bedroom was the first room we fixed. Like the rest of the house, it was in very bad shape and required work. The walls had significant damage as well as the ceiling. The floor had some minor issues but we decided to install laminate flooring due to the uneven space between boards, some discoloration, and other minor issues, something quite normal. The room is 15 x 15 feet and it has two floor to ceiling windows due to the low ceiling (seven feet or so). The house does not have any closets, except for the one in the living room, something common for this type of construction. The room had a makeshift shell of a closet that was falling to the side, kind of hanging there with no support. We thought about using vintage his and her armoires but settled on the idea of building a walk-in closet around the chimney space, which worked out great. The chimney was in rough shape and had to be covered anyway so the space was ideal for it. I thought that building the closet would rob the room of space but it worked out well; we don’t miss the space and it was a much needed use of it. Because this was the room at the far end, we knew that it would be the coldest room. The pellet stove does a great job at heating the house, however, we decided that adding an electric fireplace on a corner would be a good idea, just in case we needed extra heat on a cold winter. This arrangement has worked fine.
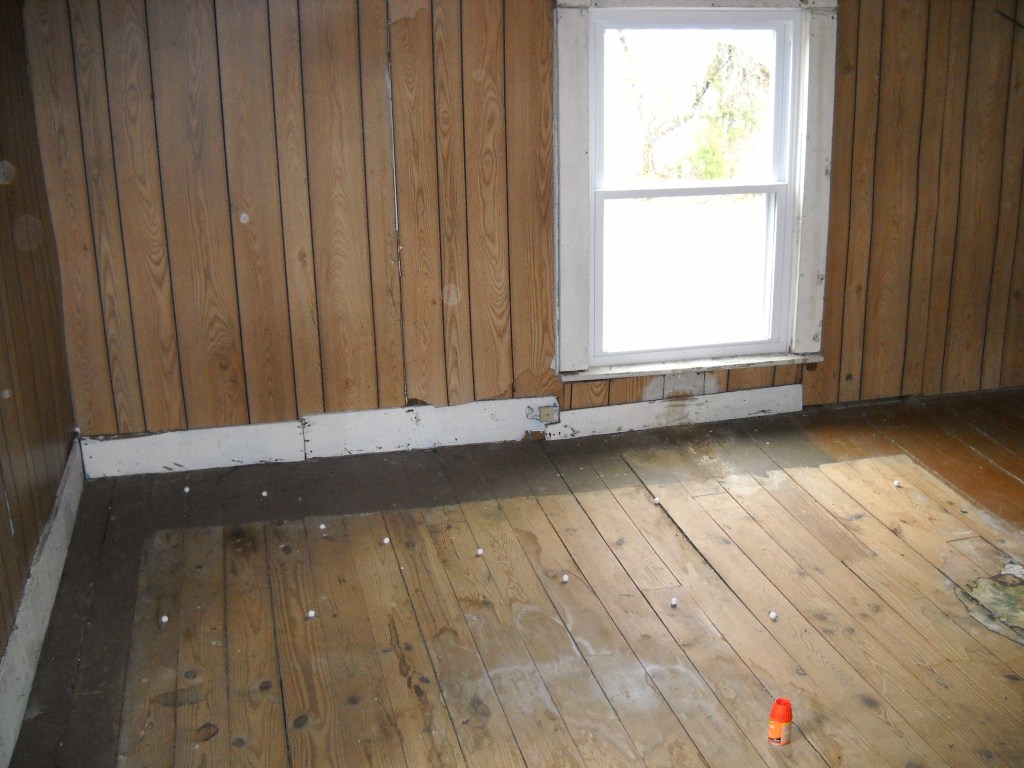
Here are a few pictures of the before, during, and after process.
Here you can see the condition of the floor as well as the unfinished molding that might have been left like that by a former renter.
There was a mattress on the floor but no frame, ripped-off linoleum, and tons of garbage that we had to clean out before starting any work. We figured out that the reason for no bed frame was that it was impossible to bring anything upstairs due to the narrow stairway and low ceilings. We had to fold the mattresses using heavy load straps to be able to get them down. We could not throw them outside through the windows. It was a challenge.
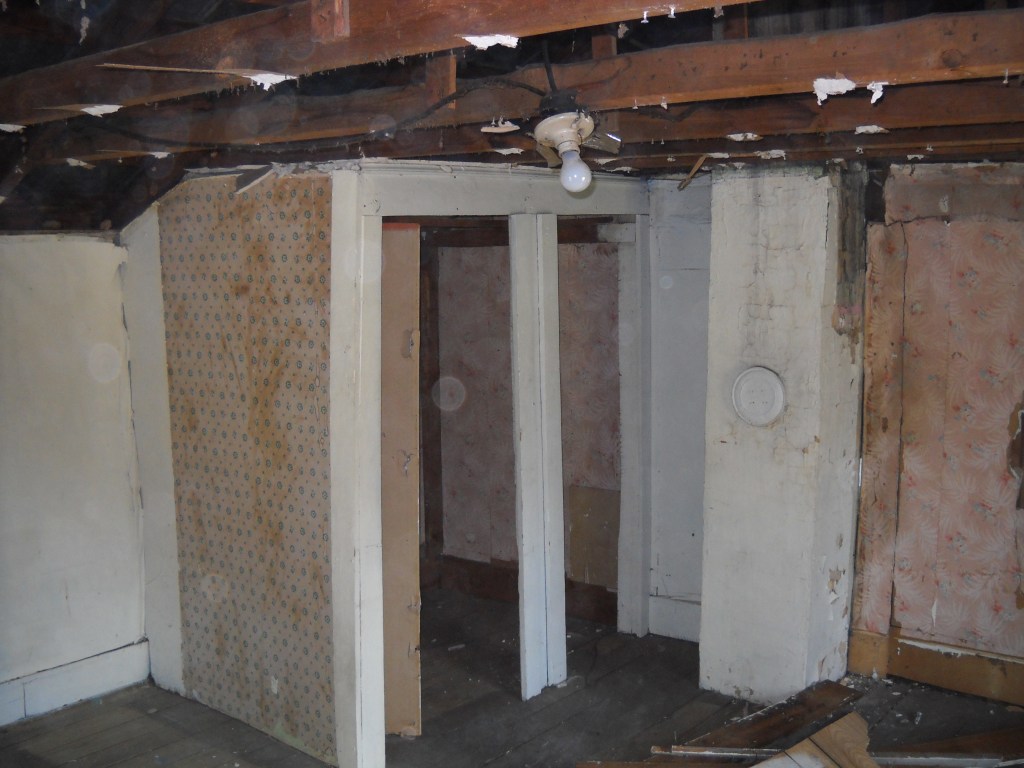
The opposite side facing the other room (now the office). Here you can see the many layers of wallpaper, paint, and several materials used by former owner/renters.
The closet wall was loose; nothing was holding it secure. You can also see the old chimney.
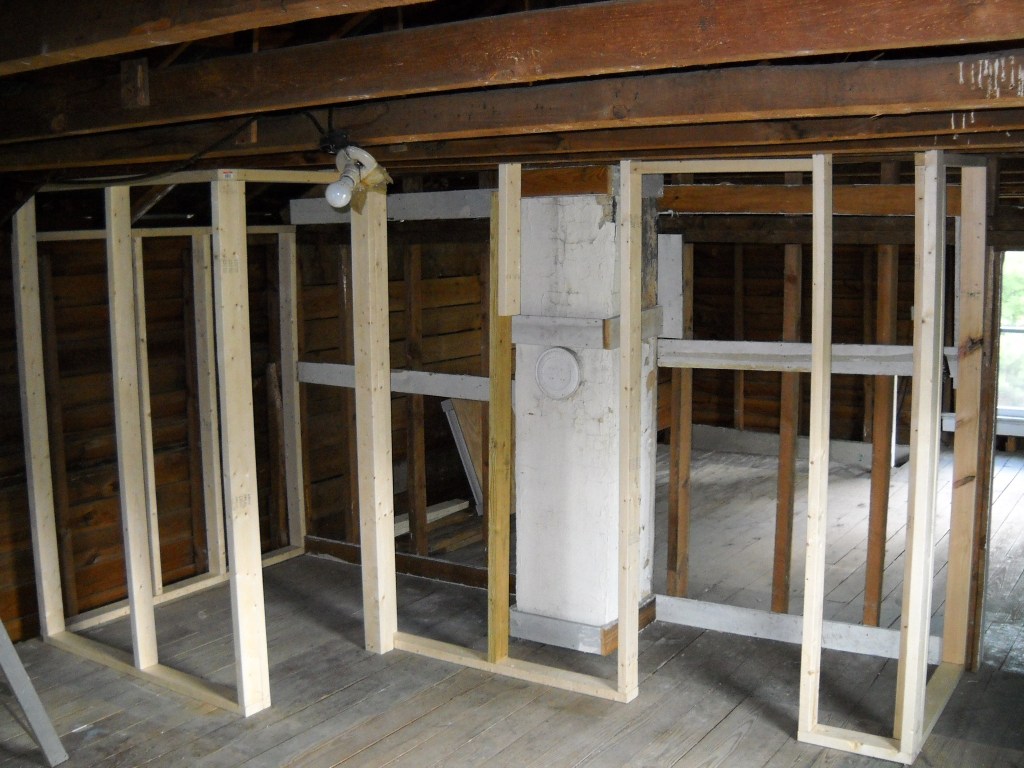
Building the closet. You can see the other room behind (the office).
The other side of the room, where the bed would be located. There were areas on the floor that were painted brown and other square areas were left in the natural wood. I could not figure out why.
Although the closet connects, we decided having two doors and separate spaces was the best option.
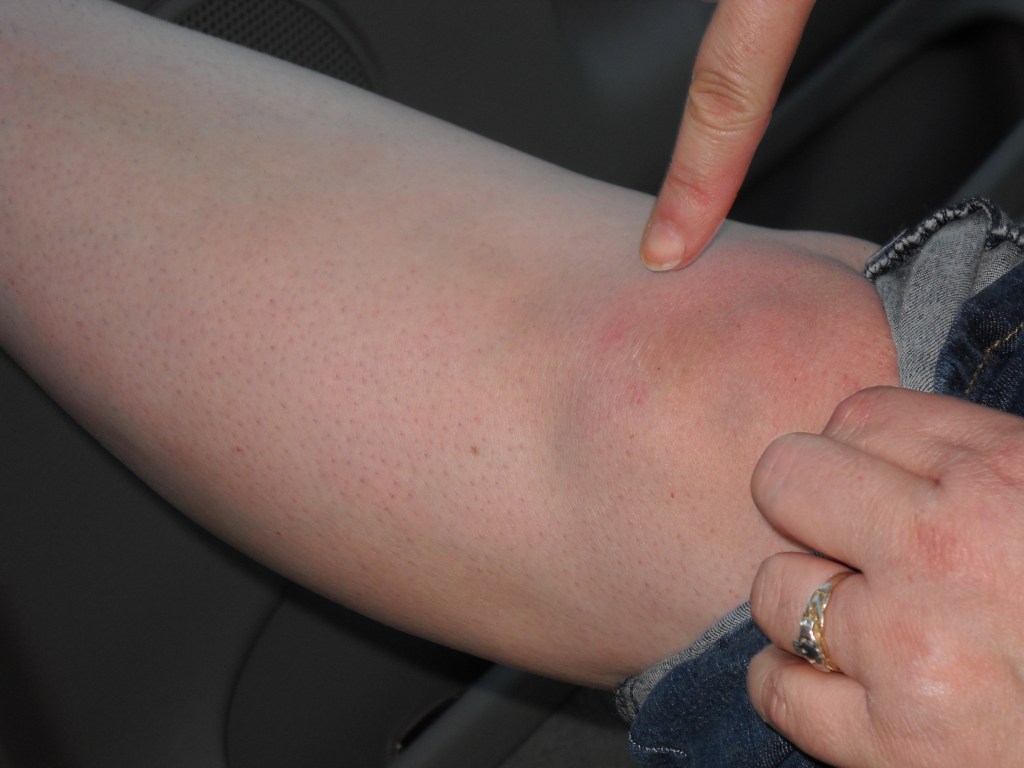
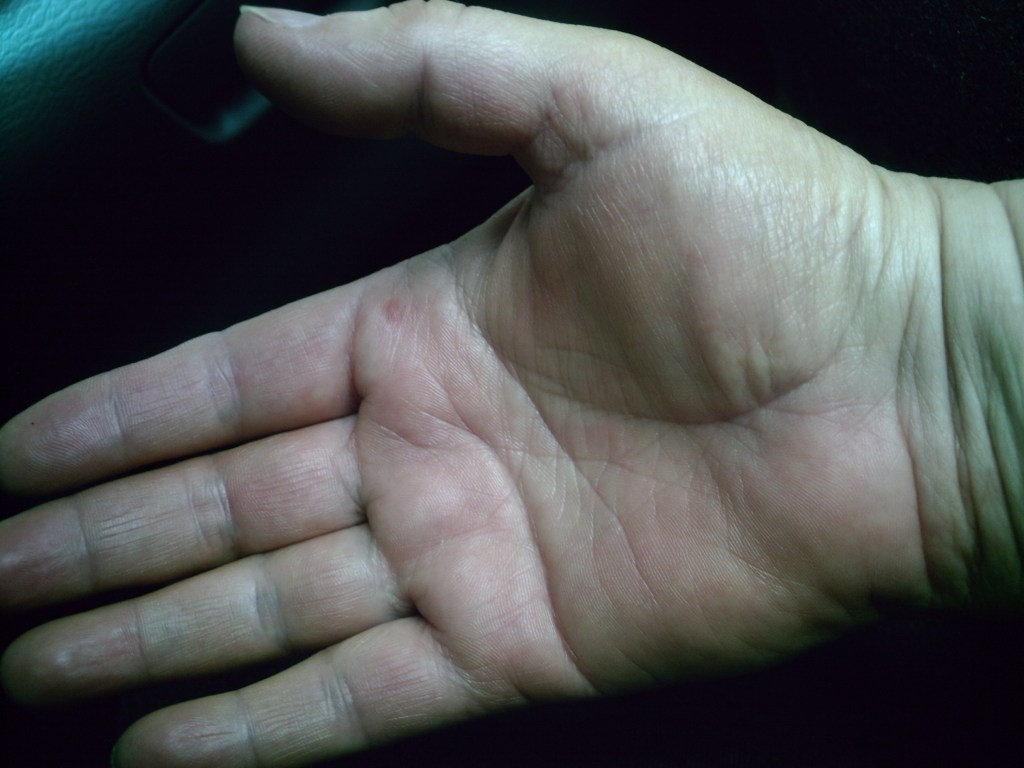
First wasp bite. I was a bit nervous because I didn’t know if I was allergic or not.
Eventually, one gets used to it.
AFTER
The finished side near the entrance that connects the office.
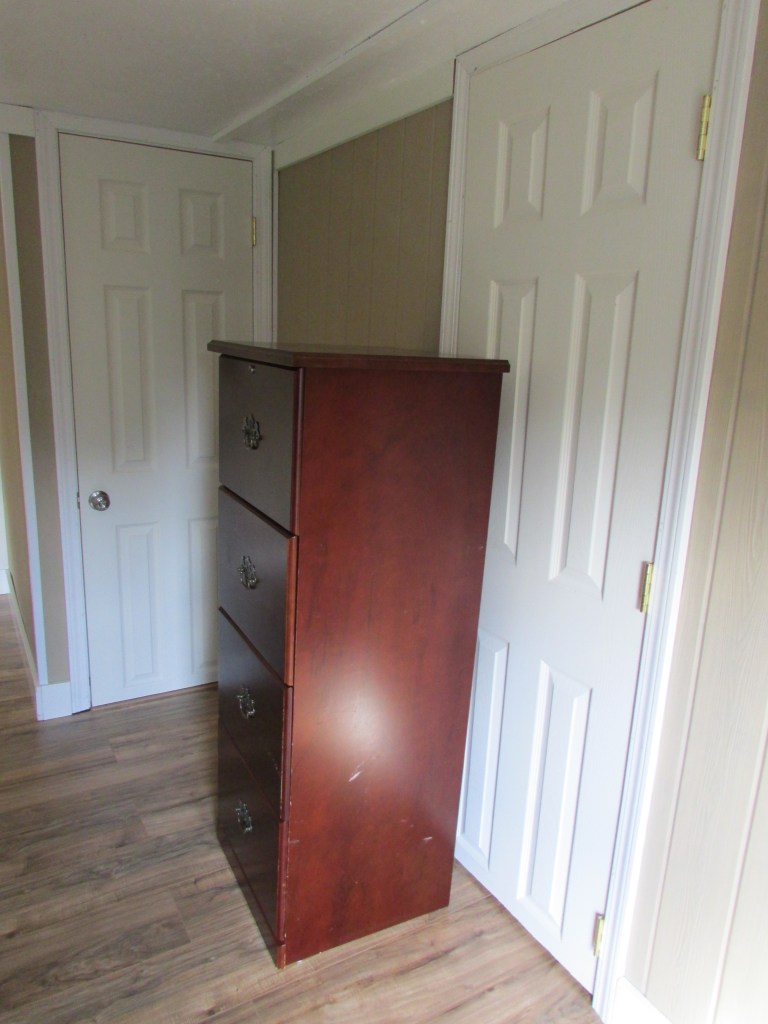
Closet doors have been installed (don’t mind the cabinet that does not belong there). We painted the doors nutmeg.
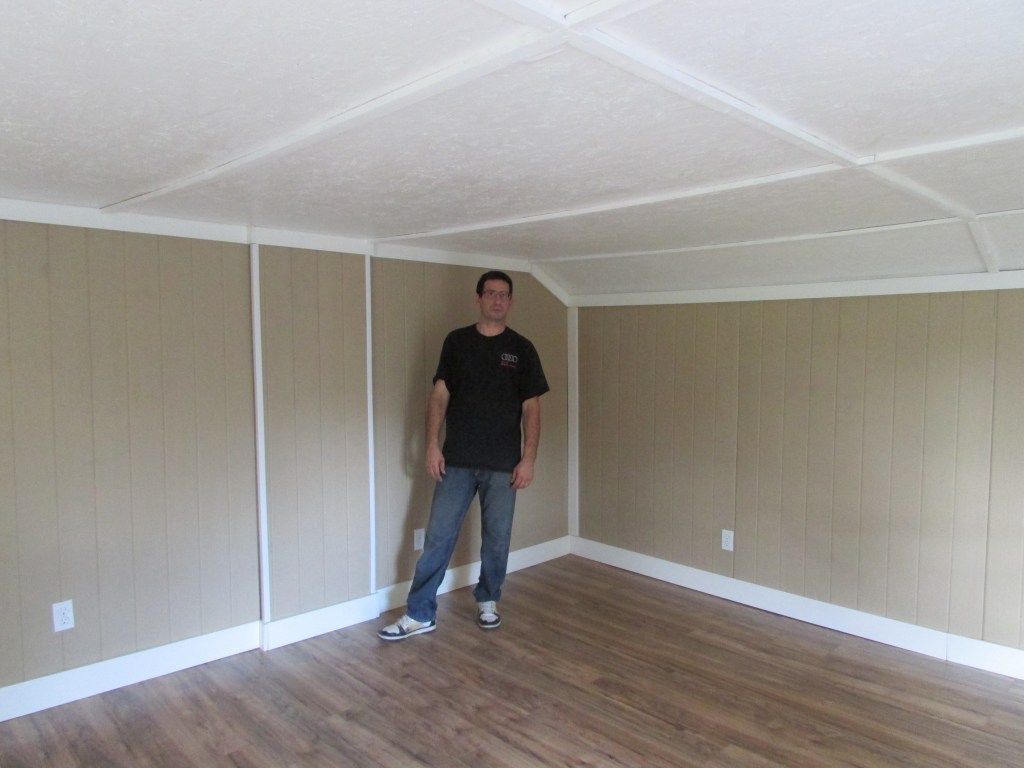
“Ahh, it feels good to finish one room.”
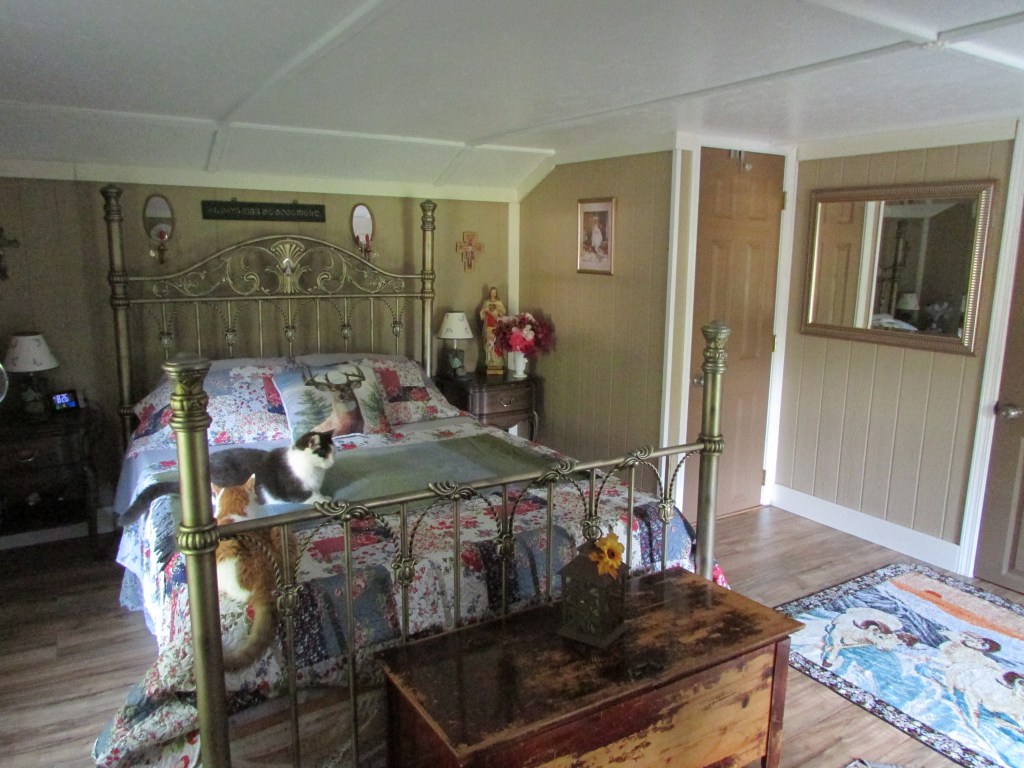
From the office to the bedroom, at that same spot. Room as it is now.
Here you can see the closet doors painted nutmeg, and a few cats.
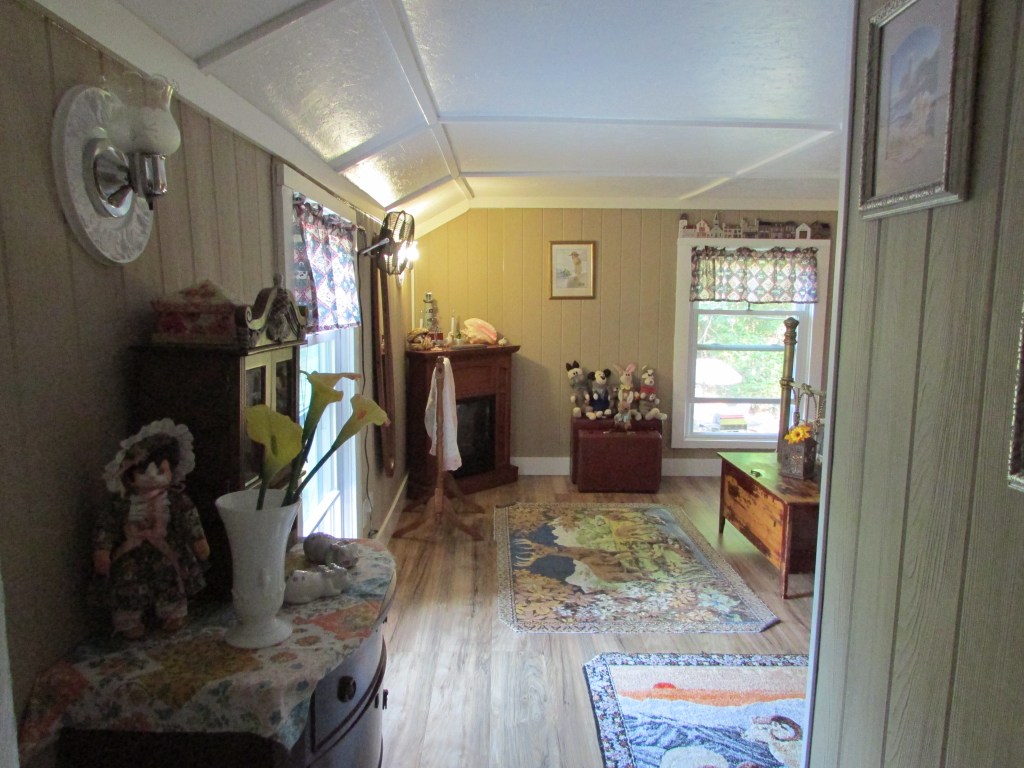
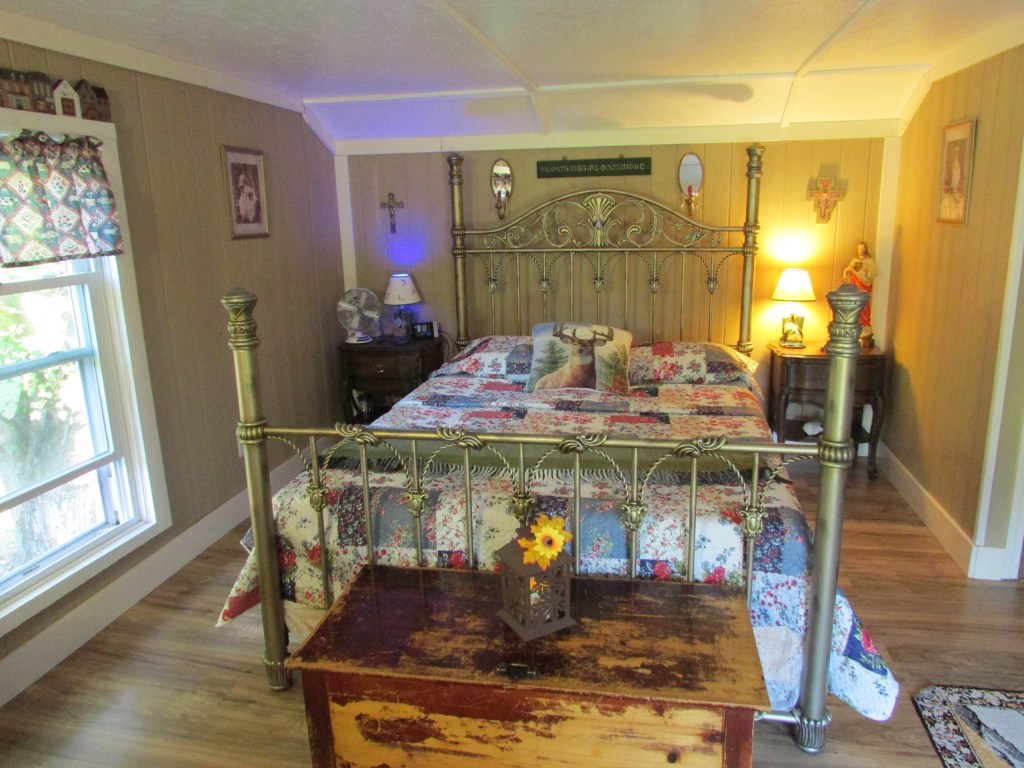
After building the closet there was enough room for a queen size bed and two night tables. The use of the space worked out.
Opposite side.
The cat that came with the house. She was living under the house, and now she has no desire for the outdoors.
This concludes the Fixing an Old Farmhouse series, for now. There is still some work that needs to be done, mostly the porch flooring (slate) and the future installation of a new roof (biggest ticket item). There are a few things to build outdoors, and a garden to develop slowly. I will share more on future posts as we complete each project. It has been a labor of love, exhausting at times but rewarding in many ways, fun too. I hope you have enjoyed the before and after of the process, and hope that in some way, these posts have been inspirational to someone.